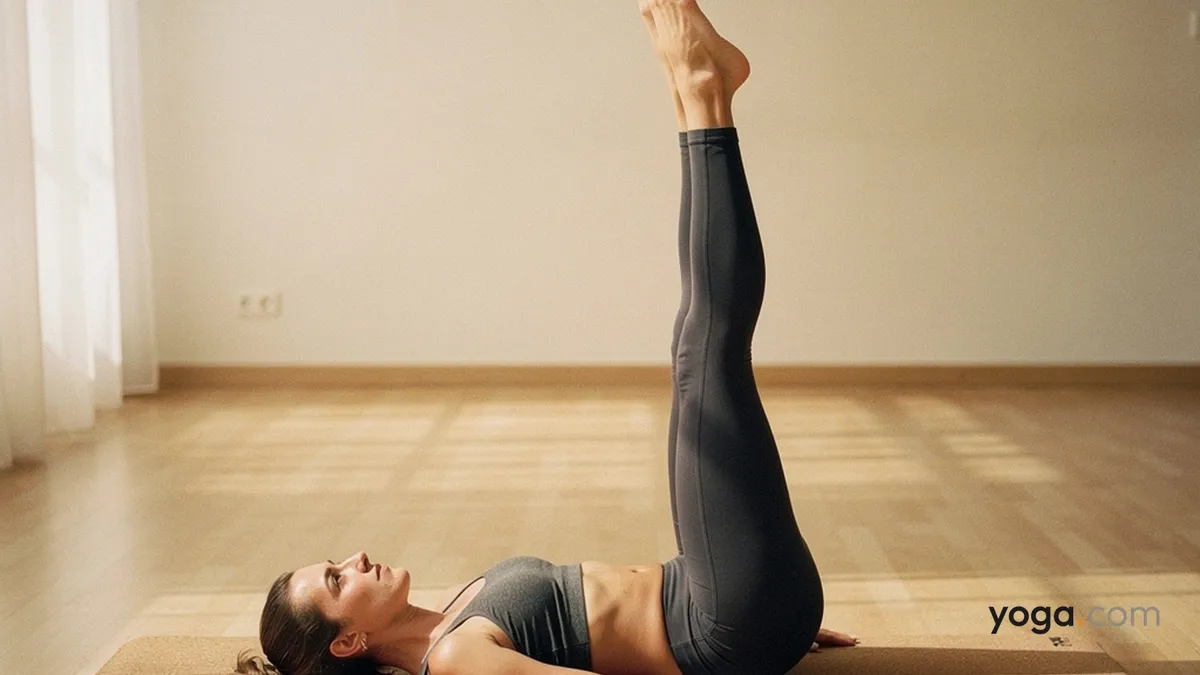
Upward Extended Feet Pose is a supine posture in which you lie on your back and extend both legs straight up toward the ceiling, stacking the feet directly over the hips. Its Sanskrit name, Ūrdhva Prasārita Pādāsana, translates literally as "upward extended feet pose" — ūrdhva meaning upward, prasārita meaning spread or extended, and pādāsana meaning feet pose. It appears commonly as a transitional shape, a warm-up for inversions, or a closing sequence pose before Corpse Pose.
At a Glance
Level: BeginnerType: SupineTargets: Hamstrings, hip flexors, core, lower backGood for: Building abdominal engagement, lengthening the posterior chain, calming the nervous system toward end of practiceHow to Do Upward Extended Feet Pose
Lie flat on your back with your legs extended along the mat and your arms resting alongside your body, palms facing down.Press the back of your skull, your shoulder blades, and your sacrum evenly into the floor. Take a breath here to establish contact with the ground.On an exhale, draw your lower belly in and gently press your lumbar spine toward the mat — you don't need to flatten it completely, but avoid an exaggerated arch.On your next inhale, slowly lift both legs together, keeping them straight and close. Lead the movement from the hip flexors rather than swinging the feet up.Continue raising the legs until they are perpendicular to the floor, or as close to vertical as your hamstring length comfortably allows. Flex your feet, spreading through the toes, and press the heels toward the ceiling.Keep your arms active against the mat, your shoulders relaxed away from your ears, and your gaze directed straight up toward your feet or softly at the ceiling. Breathe steadily for 5–10 breaths.To come out, engage your core and slowly lower both legs together on an exhale, controlling the descent all the way back to the mat. Avoid letting the lower back arch away from the floor as the legs descend.Rest with both knees drawn into the chest for a breath or two before extending fully into Corpse Pose.Benefits
Stretches the hamstrings and calves through active lengthening with the legs vertical.Strengthens the hip flexors and lower abdominals, particularly during the controlled lift and lowering phases.Activates the deep core stabilizers as they work to maintain a neutral pelvis against the weight of the legs.Encourages lengthening of the lumbar musculature when the lower back maintains contact with the floor.Promotes circulation from the lower limbs back toward the torso through the inverted orientation of the legs.Common Mistakes and Alignment Cues
Mistake: Lower back lifts off the mat. Cue: Before raising the legs, draw the low belly in. If your back arches as the legs climb, only take the legs as high as you can while keeping the sacrum grounded.Mistake: Legs drift apart or knees bend. Cue: Actively inner-rotate the thighs slightly and press the big-toe mounds toward each other; keep a micro-bend at the knees if full extension creates strain.Mistake: Shoulders and neck tense up. Cue: Soften the grip of your arms and let the tops of your shoulders melt toward the floor; your gaze stays soft, not strained.Mistake: Swinging or dropping the legs on the way down. Cue: The descent should take at least as long as the ascent — use an exhale to control every inch, treating the lowering as the actual strength work of the pose.Modifications and Props
Tight hamstrings: Loop a strap around the soles of both feet and hold one end in each hand. This lets you maintain straight legs without pulling the lower back off the mat.Limited hamstring or hip flexor flexibility: Practice with a slight bend in both knees so the pose remains accessible and the spine stays grounded throughout.Wall support: Scoot your sit bones close to a wall and rest the legs straight up against it. This supported version removes the balance and strength demand entirely, making it appropriate when you need a passive stretch.Core support: Place a folded blanket under the sacrum to slightly tilt the pelvis and reduce the demand on the lower abdominals as you build strength over time.Cautions
Avoid the full vertical position if you experience sharp pain or strong pulling in the lower back; work with bent knees or use the wall variation instead.Take care during pregnancy, especially in the second and third trimesters, as sustained supine poses may be unsuitable — consult your care provider.If you have a recent hamstring tear or strain, use a strap and only raise the legs to the angle where you feel a moderate stretch, not sharp sensation.Those with unmanaged high blood pressure or eye pressure should approach inverted leg positions cautiously and avoid breath-holding.If you're working with an injury or a medical condition, check with a qualified professional before practicing.
Related Poses
Knee Press Both Legs — a gentle warm-up that mobilizes the lower back and hips before the legs extend upward.Right Leg Wind Freeing Pose and Left Leg Wind Freeing Pose — single-leg preparatory poses that build the hip-flexor engagement used here.Bridge Pose — a natural counter-pose that opens the hip flexors and chest after the anterior compression of this shape.Corpse Pose — the ideal resting pose to follow once you lower the legs and allow the nervous system to settle.Practice this pose in context: A Gentle Yoga Routine for Tired, Low-Energy Days or reset your afternoon with A 10-Move Chair Yoga Sequence for a Midday Reset.