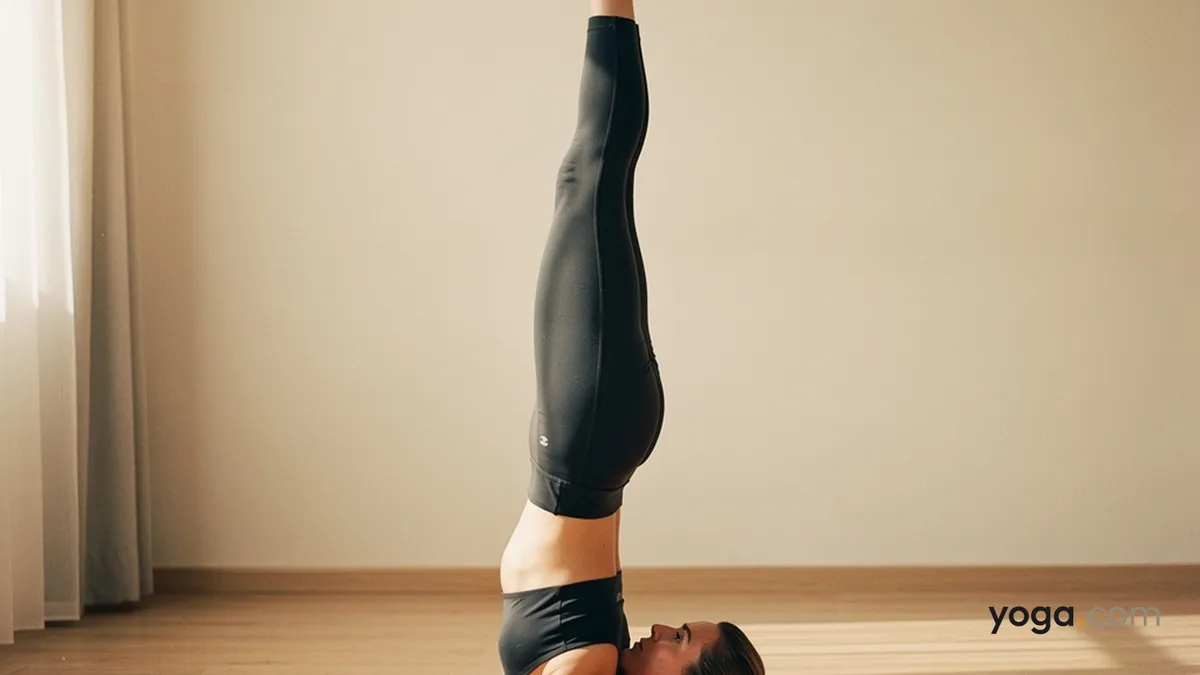
Unsupported Shoulderstand (Nirālamba Sarvāṅgāsana — literally "all-limbs pose without support") is the arm-free evolution of the classical Supported Shoulderstand. With both arms resting alongside the body or extended overhead, the torso and legs rely entirely on core engagement, spinal elongation, and precise muscular coordination to stay vertical. It belongs near the peak of an inversion sequence, practiced only after the supported version feels fully stable.
At a Glance
Level: AdvancedType: InversionTargets: Deep core stabilizers, posterior shoulder girdle, cervical and thoracic spine extensors, hip flexorsGood for: Building full-body axial alignment, developing postural control in inversion, strengthening the shoulder and upper-back complexHow to Do Unsupported Shoulderstand
Begin in Supported Shoulderstand. Lie on your back, swing your legs overhead, and come into the supported version with your hands pressing firmly into your mid-back and your body stacked from shoulders to heels. Spend several breaths here confirming that your weight rests on the back of your shoulders — not the neck — and that your spine is long.Establish the base. Draw your shoulder blades together and down, broaden across the collarbones, and press the upper arms evenly into the mat. The neck is gently flexed, chin toward chest — never turn the head; keep weight on the shoulders.Engage the core deeply. Before releasing the hands, pull your low belly in and up, knit the lower ribs together, and feel the inner thighs squeeze toward each other. This contraction is what will hold you.Release one hand at a time. Slowly slide one palm down to the mat alongside your hip, keeping the elbow close to the body. Pause, recalibrate your balance, then lower the second hand. Arms lie long beside your torso, palms down or facing up.Refine the vertical line. Press through all ten toes, lengthen the sitting bones toward the ceiling, and maintain steady, even breath. If your hips begin to tip or your neck feels compressed, return your hands to your back immediately.Optional arm variation. Once stable, extend both arms overhead along the mat (biceps beside the ears) or lift them to point toward the ceiling, parallel to your legs — the fullest expression of the pose.Hold for 5–15 breaths, then return the hands to your back before you lower down.Come out with control. Replace both hands on the mid-back, bend your knees, and slowly roll the spine vertebra by vertebra back to the mat. Rest in Bridge Pose or Corpse Pose for several breaths before continuing.Benefits
Strengthens the deep abdominal and spinal stabilizers required to maintain a vertical line without arm supportBuilds isometric strength in the posterior shoulder girdle and upper trapeziusStretches the cervical and upper thoracic extensors and the front of the shouldersDevelops proprioceptive awareness of axial alignment in a fully inverted positionChallenges hip flexor length under load, lengthening the iliopsoas as the legs extend upwardCommon Mistakes and Alignment Cues
Mistake: Weight rolls onto the neck. Cue: Before releasing your hands, confirm that you feel pressure across the tops of the shoulders, not on the cervical vertebrae. If in doubt, stay supported.Mistake: Hips pike or drift away from vertical immediately. Cue: Re-engage the inner thighs and low belly before you let the hands go; think of lifting the sitting bones higher as the hands descend.Mistake: Arms fly wide away from the body. Cue: Keep your elbows drawn toward each other; arms that splay signal the core isn't ready to hold the pose without compensating.Mistake: Breath becomes short and held. Cue: If you can't take three full, smooth breaths in the unsupported position, return to supported — the pose hasn't stabilized yet.Mistake: Rushing out of the pose. Cue: Always replace both hands on the back before lowering; an uncontrolled descent can strain the neck and lower back.Modifications and Props
Folded blankets under the shoulders: Stack two or three firm blankets so your shoulders are elevated and your head rests lower. This reduces the angle of neck compression and is recommended for most practitioners.Wall for feet: Practice against a wall, feet pressing lightly into it, to learn the muscular engagement before committing to the freestanding balance.One hand released at a time: Work the transition gradually — hold with one hand for several breaths, then alternate — before releasing both simultaneously.Return to Supported Shoulderstand: If any step feels unstable, simply bring the hands back to the mid-back. Supported Shoulderstand is a complete, worthy pose in its own right.Cautions
Avoid this pose if you have a neck injury, cervical disc issues, or any condition where compression of the cervical spine is contraindicated.Do not practice during menstruation if your tradition advises against inversions at that time.Those with high or unmanaged blood pressure, glaucoma, or detached retina should avoid full inversions.This is an advanced progression — only attempt the unsupported variation after Supported Shoulderstand is fully stable and comfortable for at least 1–2 minutes.If you're working with an injury or a medical condition, check with a qualified professional before practicing.
Related Poses
Bridge Pose — an accessible back-preparatory pose that opens the chest and activates the shoulder girdle before inversionPlow Pose — the natural counter-progression, folding from Shoulderstand to stretch the posterior spineEar Pressure Pose — a deep spinal flexion variation that follows naturally in the same inversion sequenceCorpse Pose — the essential counter-pose after any deep inversion to allow the nervous system to settleLooking to build a broader practice context? See A Gentle Yoga Routine for Tired, Low-Energy Days and A 10-Move Chair Yoga Sequence for a Midday Reset.