Upward Easy Bow Pose is a supported, accessible backbend that opens the front body and serves as a supported step toward full Upward Bow — making it an approachable middle step between gentler backbends and the full expression of Ūrdhva Dhanurāsana (easy variation), literally "upward bow pose." The Sanskrit root ūrdhva means "upward" and dhanur means "bow," describing the arc the body forms. You'll typically meet this pose in the peak or closing phase of a well-warmed practice.
At a Glance
Level: IntermediateType: BackbendTargets: Thoracic spine, hip flexors, shoulders, chestGood for: Building spinal extension strength, stretching the anterior body, developing shoulder stabilityHow to Do Upward Easy Bow Pose
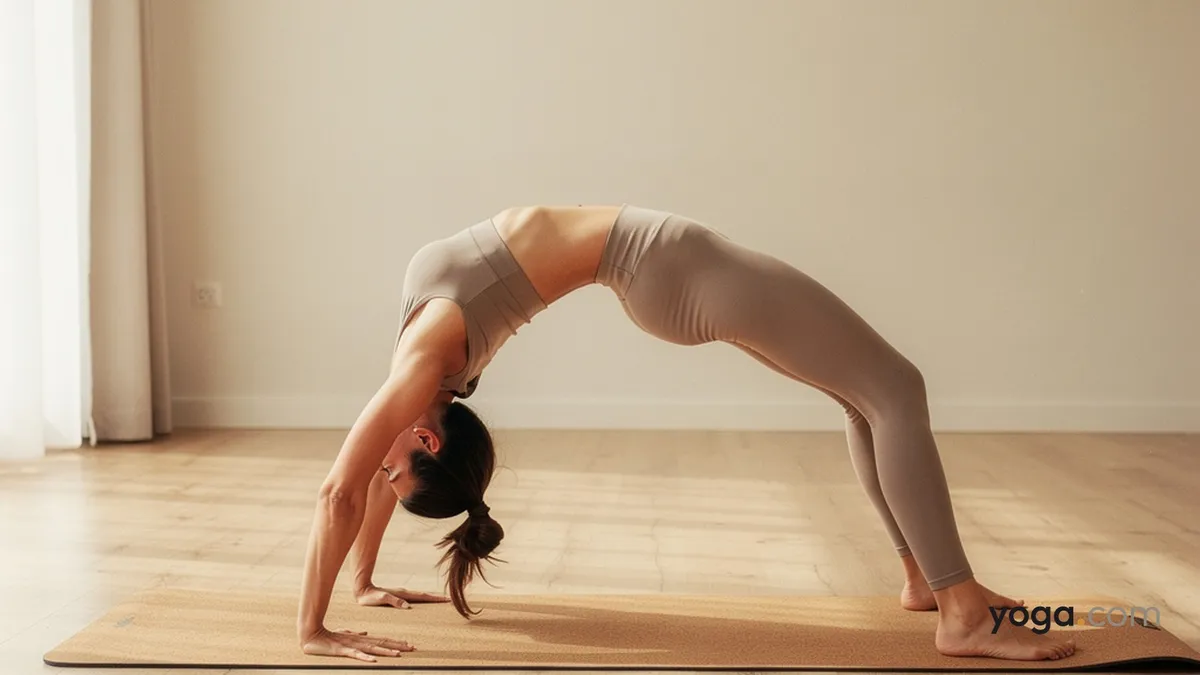
Lie on your back with your knees bent and feet flat on the mat, hip-width apart and parallel, heels close to your sitting bones.Place your hands on the mat beside your ears, fingers spread wide and pointing toward your shoulders, elbows drawing toward the ceiling.On an inhale, press firmly through both feet and both palms and lift your hips and chest off the mat, coming onto the crown of your head briefly as you assess the position of your hands and feet.Straighten your arms and lift your head fully off the floor, pressing the floor away and drawing your chest toward the wall behind you rather than straight up toward the ceiling.In this easy variation, keep your gaze softly toward the floor — do not strain your neck — and focus on broadening through the collarbones and lengthening the sternum away from the navel.Press evenly through all four corners of each foot; engage your inner thighs slightly to prevent the knees from splaying wide.Hold for 3–5 breaths, maintaining steady, even breath rather than gripping or holding.To come out, tuck your chin gently, bend your elbows and knees simultaneously, and lower yourself slowly to the mat. Rest briefly in Corpse Pose or draw your knees to your chest to neutralize the spine before repeating or moving to a counter-pose.Benefits
Stretches the hip flexors, anterior thighs, and abdominal muscles through spinal extension.Strengthens the muscles of the posterior chain — glutes, hamstrings, and spinal extensors — as they work to maintain the arc of the pose.Builds shoulder stability and mobility by loading the glenohumeral joint in an externally rotated, weight-bearing position.Expands the chest and intercostal muscles, supporting fuller range of breath.Develops wrist strength and extension capacity over time with consistent practice.Increases overall thoracic spine mobility and extension, counterbalancing prolonged forward-flexed postures.Common Mistakes and Alignment Cues
Knees splaying outward: Internally rotate your thighs slightly and imagine squeezing a block between your knees to keep them tracking over the second toe.Weight dumping into the lower back: Rather than pushing your belly toward the ceiling, press the floor away with your hands and feet equally and lengthen your tailbone toward the backs of your knees.Elbows flaring wide: Draw your elbows toward each other before you push up; this engages the triceps and protects the wrist joints.Holding the breath: Soften the jaw and throat; aim for continuous, unhurried breathing throughout the hold.Feet turning out: Set your feet parallel before you lift — once you're up, it's difficult to correct, and external rotation here can compress the sacroiliac joint.Modifications and Props
Block between the thighs: Place a yoga block at its narrowest width between your inner thighs to reinforce the alignment cue for parallel legs and build body awareness before lifting.Blocks under the hands: If your wrists are tight or your shoulders restrict the range needed to place palms flat, set blocks on their lowest height under each hand to reduce the angle of wrist extension.Wall support: Practice with your feet pressing into the baseboard of a wall for additional grounding and to help you find the sensation of pushing through the legs rather than collapsing into the lower back.Stay on the crown: If straightening the arms fully is not yet available, pause with the crown of the head resting lightly on the mat (essentially a supported preparation) and work on opening the chest and shoulders before attempting to lift all the way up.Cautions
Avoid this pose if you have a recent or acute wrist, shoulder, or neck injury; the weight-bearing demand on these joints is significant.Use caution with lower back sensitivity — build toward this pose through gentler backbends and ensure the lumbar spine is warmed and stable before attempting full lift.Pregnancy: deep spinal backbends are generally not recommended after the first trimester; consult a prenatal-specialist teacher.High or unmanaged blood pressure and glaucoma are reasons to approach inverted or intense backbend positions carefully.If you're working with an injury or a medical condition, check with a qualified professional before practicing.
Related Poses
Bridge Pose — an essential preparation that warms the same spinal extensors and hip flexors with less demand on the wrists and shoulders.Upward Bow Pose — the full expression of this pose family; practice the easy variation consistently before progressing here.Camel Pose with Palms Set Against Feet — a standing-kneeling backbend that develops thoracic extension and chest opening along the same lines.Corpse Pose — the ideal counter-pose directly after backbend work, allowing the spine and nervous system to integrate.Looking to build a broader backbend practice? See A Gentle Yoga Routine for Tired, Low-Energy Days for a restorative complement, or try A 10-Move Chair Yoga Sequence for a Midday Reset for accessible spinal work you can do anywhere.