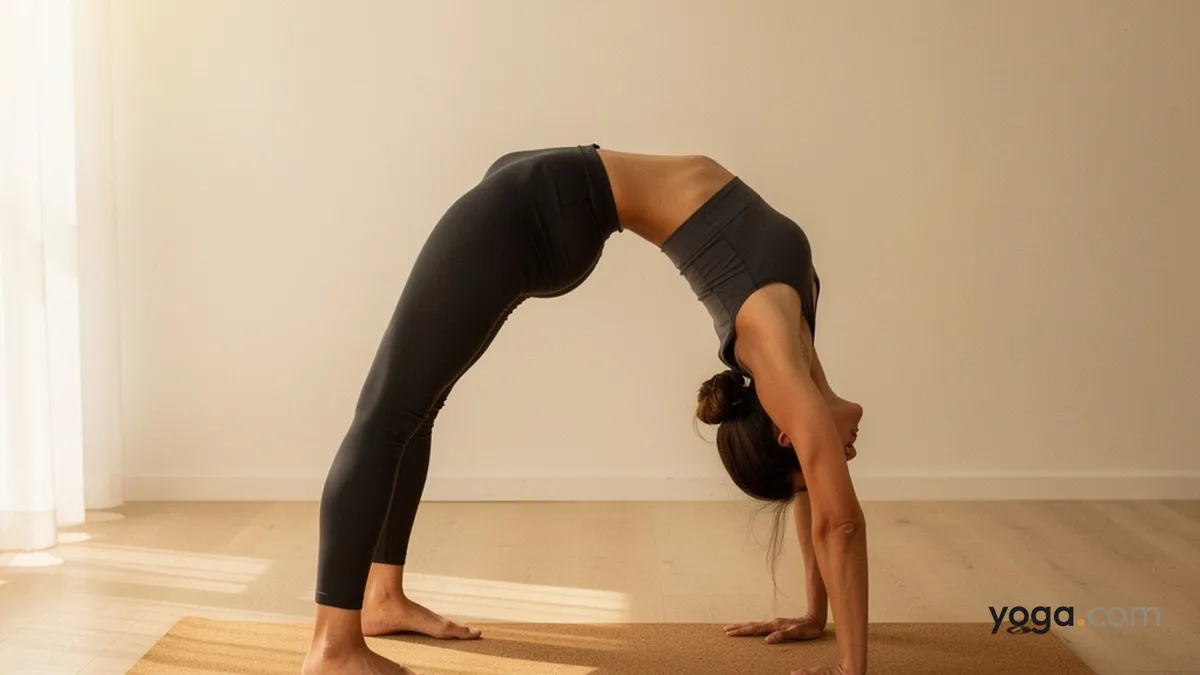
Upward Bow Pose with Straight Legs is a full backbend that takes the standard wheel shape one significant step further: rather than keeping a bend at the knees, you press the legs toward straight, dramatically deepening the opening through the front body. Its Sanskrit name, Ūrdhva Dhanurāsana (straight legs), translates literally as "upward bow pose" — and with elongated legs, the arc of the body becomes even more pronounced. This variation typically appears near the peak of an advanced practice, after thorough warm-up of the spine, shoulders, and hips.
At a Glance
Level: AdvancedType: BackbendTargets: Thoracic and lumbar spine, hip flexors, chest and anterior shoulders, hamstringsGood for: Building spinal extension strength, increasing shoulder flexibility, lengthening the hip flexorsHow to Do Upward Bow Pose with Straight Legs
Lie on your back with knees bent, feet hip-width apart and parallel, heels close to your sitting bones. Place your palms beside your ears, fingers pointing toward your shoulders.Press into your feet and hands simultaneously, lift your hips, and place the crown of your head lightly on the mat — this is your checkpoint for hand and foot position before the full lift.Firm your shoulder blades onto your back, hug your elbows toward each other, and on an exhale press evenly through all four limbs to lift into the standard Upward Bow shape with bent knees.Once stable, begin to walk your feet away from your hands, an inch at a time, straightening the knees progressively. Keep both feet flat on the floor and the big-toe mounds pressing down evenly.As the legs approach straight, press the tops of the thighs up and back, elongating the front groins. Draw the lower belly gently in to support the lumbar spine rather than compressing it.Maintain even weight across both palms, spin the upper arms outward, and let your head hang freely between your arms — gaze moves toward the floor or the wall behind you.Hold for three to five steady breaths, keeping the breath full and even throughout.To come out, bend the knees, tuck the chin, and lower onto the upper back and shoulders first — keeping the head from bearing weight — then slowly lower the hips to the mat. Draw the knees into the chest and pause in a gentle counter-stretch before your next pose.Benefits
Strengthens the spinal extensors, glutes, and hamstrings isometrically while in a loaded position.Stretches the hip flexors, quadriceps, intercostals, and anterior shoulder musculature through a full range of motion.Builds shoulder stability and wrist-bearing strength under load.Increases mobility through the thoracic spine by actively working the upper-back extensors.Develops hamstring and calf flexibility as the legs work toward extension against gravity.Challenges proprioception and whole-body coordination by requiring simultaneous engagement of the front and back body.Common Mistakes and Alignment Cues
Feet turn out as legs straighten. Keep your feet parallel and press the inner edges of your feet down; externally rotated feet dump weight into the lower back.Elbows flare wide. Actively squeeze your elbows toward each other throughout; use a strap looped around your upper arms at shoulder width during practice to train the action.Lower back crunches rather than extending evenly. Walk the feet forward gradually and prioritize lifting through the mid-back; if the lumbar feels compressed, return to bent-knee Upward Bow first.Weight collapses into the wrists. Spread your fingers wide and press firmly through the base of the index fingers and thumbs, distributing load across the entire palm.Breath becomes shallow or held. If you cannot maintain a steady breath, come down — use the breath as your guide for how far to take the pose on any given day.Modifications and Props
Blocks under the hands: Place two blocks at the base of a wall and position your hands on them (fingers pointing toward the wall). The elevation reduces the demand on wrist extension and helps maintain shoulder-blade placement.Strap around the upper arms: Loop a strap at shoulder width to prevent elbow flaring and reinforce proper shoulder mechanics while you build the habit.Wall walk-down: Stand facing away from the wall, walk your hands down to bent-knee Upward Bow, then experiment with straightening one leg at a time. This allows gradual load-bearing with the support of the wall nearby.Bent-knee Upward Bow first: If the straight-leg variation strains the lower back or the breath shortens immediately, practice standard Upward Bow Pose until you can hold five comfortable breaths before attempting this variant.Cautions
Avoid this pose if you have a recent or acute wrist, elbow, or shoulder injury — the straight-leg shape places significant axial load on the upper limbs.Those with disc issues in the lumbar or cervical spine should approach deep backbends with care; work with a teacher who can assess your specific spinal mobility.Do not practice this variation if you feel sharp or pinching pain in the lower back at any point; back off to a modified version instead.High blood pressure or glaucoma may be aggravated by full inversive backbends; consult appropriately before practicing.If you're working with an injury or a medical condition, check with a qualified professional before practicing.
Related Poses
Upward Bow Pose — the direct prerequisite; master this shape before straightening the legs.Bridge Pose — a foundational backbend that builds the spinal and glute strength needed for the full wheel family.Camel Pose with Palms Set Against Feet — deepens thoracic extension and anterior-shoulder openness, excellent preparation.Downward-Facing Dog Pose — an effective counter-pose that neutralizes the spine and stretches the shoulders after deep backbending.Looking to build a well-rounded practice around these shapes? See A Gentle Yoga Routine for Tired, Low-Energy Days for recovery-focused sequencing, or try A 10-Move Chair Yoga Sequence for a Midday Reset to maintain mobility on lighter training days.