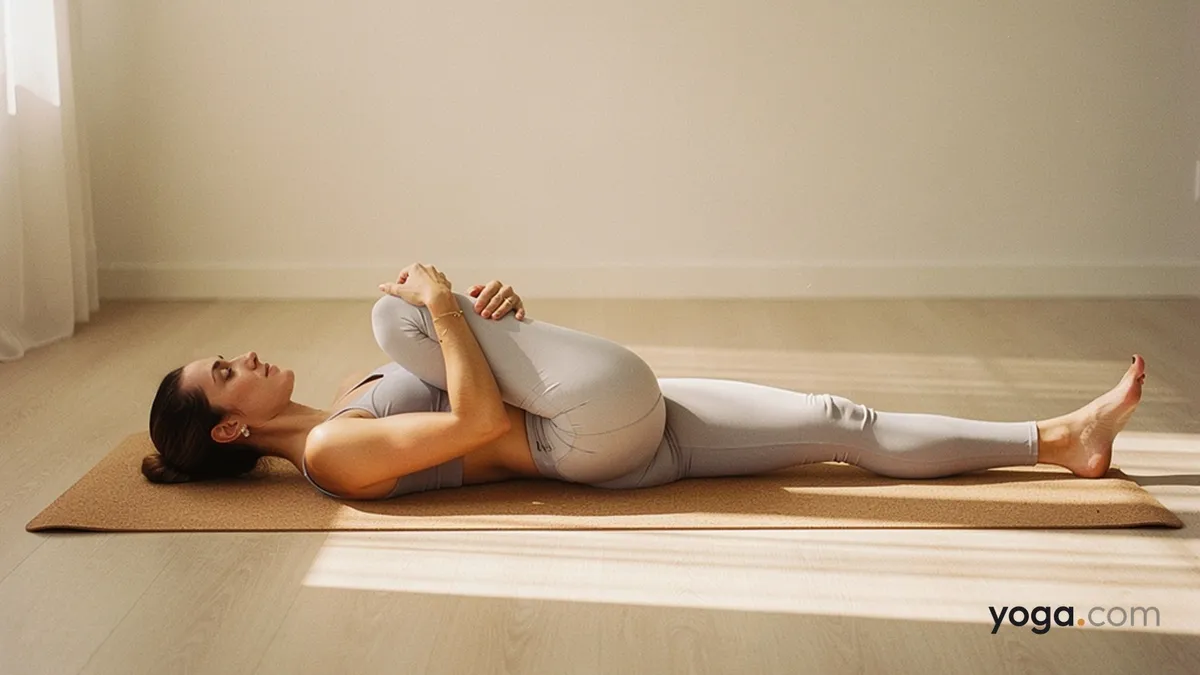
Right Leg Wind Freeing Pose — Pavanamuktāsana (right leg), from Sanskrit pavana (wind), mukta (freeing), and āsana (pose) — is a gentle supine posture in which you draw the right knee into the chest while the left leg stays extended along the mat. It is typically practiced near the end of a session as part of a supine cool-down sequence, often paired with its left-leg counterpart before progressing to the bilateral version.
At a Glance
Level: BeginnerType: SupineTargets: Hip flexors, lower back, glutes, abdominal wallGood for: Stretching the right hip and lower back, building awareness of spinal symmetry, winding down the nervous system after active practiceHow to Do Right Leg Wind Freeing Pose
Lie on your back with both legs extended along the mat, arms at your sides, and the back of your head resting comfortably. Take a breath here to settle.On an exhale, bend your right knee and draw it toward your chest. Keep your left leg active — flex the left foot gently and press the back of the left thigh toward the floor.Interlace your fingers just below the right kneecap (not on top of the joint), or clasp your hands around the right shin. Draw the knee in only as far as your lower back stays in gentle contact with the mat.Soften your right hip socket — allow the femur to settle into the hip joint rather than gripping it there with muscular force.Relax your shoulders down away from your ears. Let your neck be long, gaze directed straight up toward the ceiling.Hold for 5–10 smooth breaths, using each exhale to encourage a gentle deepening of the knee-to-chest position without forcing.To come out, release your hands and slowly extend the right leg back along the mat on an exhale. Pause for a breath to notice any difference between your two sides before continuing.Benefits
Stretches the right hip flexors, piriformis, and gluteal muscles.Gently mobilizes the right side of the lumbar spine and sacroiliac region.Lengthens the muscles along the right side of the lower back.Encourages diaphragmatic breathing by creating mild compression against the abdominal wall.Develops body-side awareness by isolating one leg at a time, which can reveal and address asymmetries in hip range of motion.Common Mistakes and Alignment Cues
Gripping on top of the knee: Placing hands directly over the kneecap loads the joint unevenly. Instead, clasp the shin or interlace fingers below the knee on the upper shin.Lifting the opposite hip: If the left hip rises off the mat, you've drawn the right knee too far in. Ease the knee back until both hips stay grounded.Tensing the neck and shoulders: It's common to unconsciously hoist the shoulders up. Consciously draw the shoulder blades down and wide; keep the chin slightly tucked so the neck stays neutral.Letting the extended leg collapse outward: The left leg tends to externally rotate and splay. Maintain a gentle internal engagement — imagine you're pressing the left heel away from you along the floor.Holding the breath: Students often brace on the inhale. Breathe steadily throughout; use the exhale as the natural moment to draw the knee a fraction closer.Modifications and Props
Strap around the shin: If your hands don't reach the shin comfortably or your shoulders pull forward, loop a strap around the right shin and hold one end in each hand. This keeps your upper body relaxed.Rolled blanket under the head: If your chin juts upward and your neck feels compressed, place a folded blanket under your head to restore a neutral spine from skull to tailbone.Bolster under the extended knee: For students with lower-back sensitivity, slide a rolled blanket or bolster under the left (extended) knee to take strain off the lumbar curve.Bent left knee: If keeping the left leg fully extended creates discomfort in the lower back, plant the left foot on the mat with the knee bent. This flattens the lumbar spine and reduces tension.Cautions
Recent abdominal surgery: The compression on the lower abdomen makes this pose inadvisable until you have medical clearance.Knee injury or acute inflammation: Avoid clasping directly behind or on the knee if there is any swelling or pain; use a strap around the thigh instead, or skip the pose until the acute phase resolves.Hip replacement: Depending on surgical approach, deep hip flexion may be restricted. Follow your surgeon's range-of-motion guidelines.Late pregnancy: Lying fully supine for extended periods is generally discouraged after the first trimester; adapt to a supported semi-reclined position or choose an alternative.If you're working with an injury or a medical condition, check with a qualified professional before practicing.
Related Poses
Left Leg Wind Freeing Pose — the natural counterpart; always practice both sides for balance.Knee Press Both Legs — the bilateral progression once both single-leg versions feel accessible.Lying Diamond Pose — a complementary supine hip opener that prepares similar muscle groups.Corpse Pose — the natural resting pose to follow after completing both sides.See this pose in context: A Gentle Yoga Routine for Tired, Low-Energy Days and A 10-Move Chair Yoga Sequence for a Midday Reset.