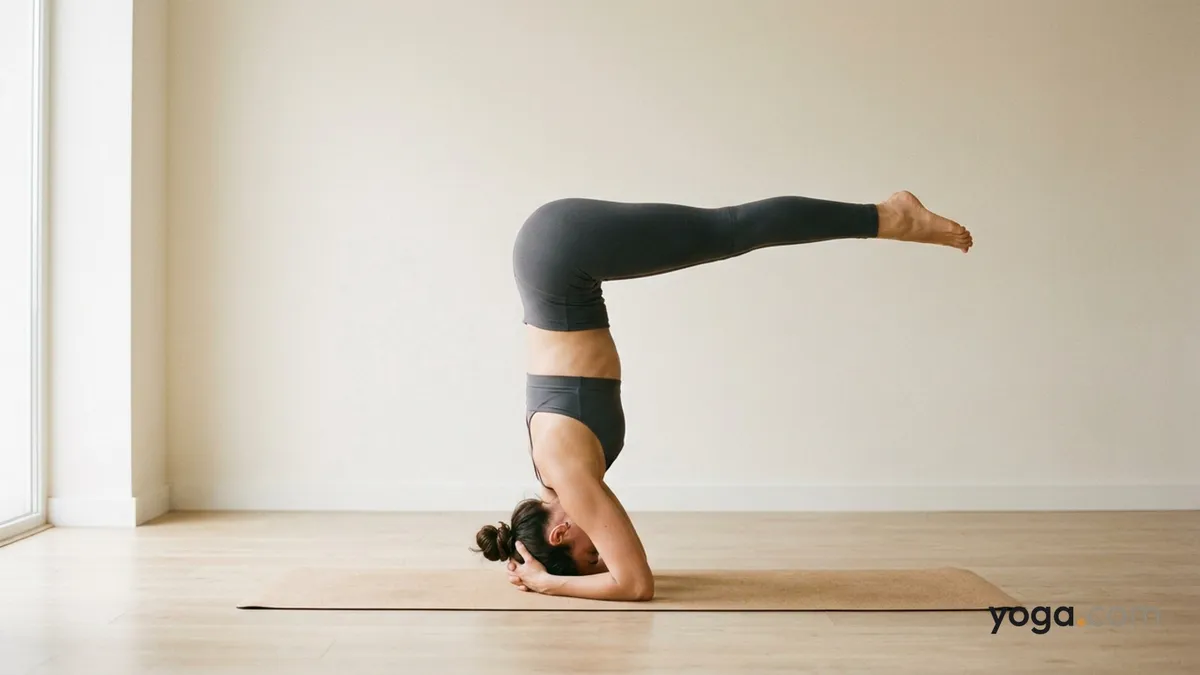
Supported Headstand with Legs Parallel to Floor is a demanding variation of the classical inversion known in Sanskrit as Sālamba Śīrṣāsana (legs parallel to floor) — sālamba meaning "with support," śīrṣa meaning "head." Rather than reaching the legs straight up toward the ceiling, you hold them extended horizontally, forming a ninety-degree angle at the hips. This variation asks for refined core control and shoulder stability, and it typically appears near the peak of an advanced inversion sequence.
At a Glance
Level: AdvancedType: InversionTargets: Core (deep abdominals and hip flexors), shoulders and upper back, cervical and thoracic spine, hamstringsGood for: Building isometric core strength, developing scapular stability under load, improving proprioceptive awareness of hip alignmentHow to Do Supported Headstand with Legs Parallel to Floor
Kneel at your mat and interlace your fingers, placing your forearms on the floor shoulder-width apart. Set the crown of your head on the mat, cradled by your cupped hands — not the forehead or back of skull.Tuck your toes, straighten your knees, and walk your feet toward your face until your hips stack over your shoulders. Pause here and root through your forearms, pressing the floor away to lift weight out of your neck.Draw your knees toward your chest, engaging your lower abdominals. Resist any urge to kick or swing — control the ascent completely.Extend both legs straight up to the ceiling, arriving in full Supported Headstand. Firm your inner thighs together, flex your feet, and find a steady breath before proceeding.On an exhale, engage your hip flexors and slowly lower both legs together — keeping them fully extended — until your thighs are parallel to the floor. Your body now forms a ninety-degree angle at the hips.Hold the position for 5–15 breaths. Press your forearms firmly into the mat, keep your shoulder blades wide and pulling away from your ears, and maintain a long, neutral lumbar spine. Avoid letting the low back arch to compensate.To come out, inhale and slowly raise your legs back to vertical. Pause in full headstand for one breath, then bend your knees and lower your feet to the floor with control.Rest in Child's Pose for at least five breaths before sitting up, allowing blood pressure to normalize gradually.Benefits
Strengthens the rectus abdominis, transverse abdominis, and hip flexors isometrically under significant loadBuilds scapular stability and serratus anterior activation as the shoulders work to support the suspended torsoLengthens the hamstrings through active engagement at the hip crease while the legs are held horizontalDevelops proprioceptive precision and neuromuscular control through the hips and pelvisReinforces spinal elongation and intervertebral decompression along the thoracic and lumbar spine when alignment is soundCommon Mistakes and Alignment Cues
Dumping weight into the head and neck: Press your forearms actively into the floor so your head barely grazes the mat — your arms do the structural work.Allowing the low back to arch as the legs lower: Before you begin to descend, draw your lower ribs toward your hip points; keep that connection throughout the movement.Legs drifting below parallel: Think of the legs as a shelf — horizontal, no lower — and use a mirror or a teacher's eye to calibrate until you can feel the position accurately.Shoulders creeping toward the ears: Broaden your collarbones and draw your shoulder blades down your back; the elevation usually signals that your arms are not bearing enough load.Holding the breath: Maintain smooth, even breathing; a forced or suspended breath signals you've exceeded your current edge for this hold.Modifications and Props
Wall support: Practice full headstand with your heels touching the wall, then lower the legs away from the wall toward parallel. The wall provides a safety net while you build confidence in the lowering phase.Bent-knee variation: Instead of fully extended legs, bend your knees to ninety degrees and hold the shins parallel to the floor. This significantly reduces the lever arm and the demand on the hip flexors.Forearm blocks: Place a block under each forearm (not under the head) to increase the height of the base and reduce neck compression if your shoulder-to-floor distance is short.Partner assist: Have a partner stand to the side and lightly support the back of your thighs as you lower, helping you find true horizontal without over-relying on momentum.Cautions
Avoid this pose if you have any neck injury, cervical disc issue, or recent shoulder injury — the combined axial load and lever force are considerable.Do not practice during menstruation if you prefer to avoid inversions at that time, and avoid if you have unmanaged high blood pressure or glaucoma.This is a pose for practitioners with an established, stable full headstand — attempting the parallel-leg variation before the base inversion is secure significantly increases injury risk.Come out immediately if you feel any sharp sensation in your neck, tingling in your arms, or dizziness.If you're working with an injury or a medical condition, check with a qualified professional before practicing.
Related Poses
Headstand Preparation Pose I — build the foundational arm and neck position before invertingPlow Pose — opens the posterior body and prepares the spine for deep inversion workEar Pressure Pose — a natural progression from Plow that deepens shoulder and cervical articulationCorpse Pose — the essential counter-pose to allow the nervous system and blood pressure to settle after inversionLooking to build a balanced practice around your inversions? See A Gentle Yoga Routine for Tired, Low-Energy Days for recovery-focused sequencing, or try A 10-Move Chair Yoga Sequence for a Midday Reset on days when a full inversion practice isn't accessible.