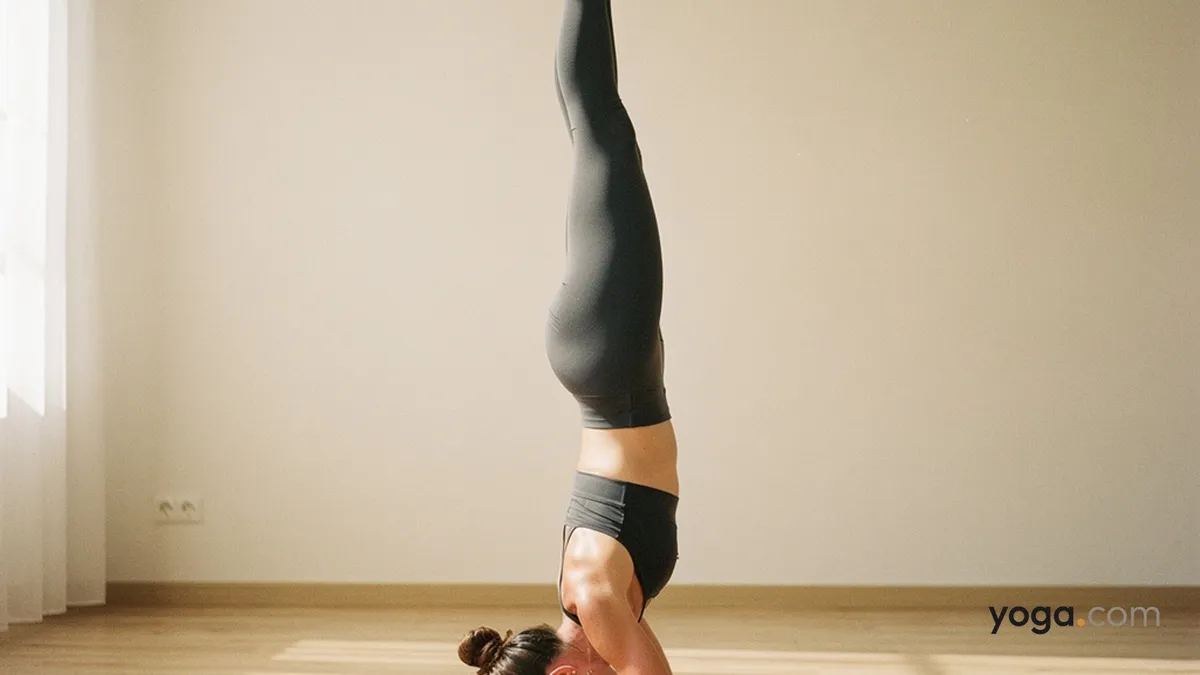
Supported Headstand with Feet Together is the classical form of the king of asanas, Sālamba Śīrṣāsana (feet together) — Sanskrit for "supported headstand" — practiced with the legs fully extended and the inner feet pressing together at the top. It appears near the peak of a strong practice, demanding that your foundation in the arms, wrists, and upper back is solid before the head ever meets the floor.
At a Glance
Level: IntermediateType: InversionTargets: Core, shoulders and upper back, cervical spine stabilizers, hip flexorsGood for: Building shoulder and scapular stability, strengthening deep abdominal muscles, developing body awareness in an inverted positionHow to Do Supported Headstand with Feet Together
Set your forearm foundation. Kneel and interlace your fingers, placing your forearms on the mat shoulder-width apart. Your elbows should be directly below your shoulders — not wider. Press the outer edges of both forearms firmly into the floor.Place the crown of your head. Set the back of your head into the cup of your interlaced hands so the crown — not the forehead or the back of the skull — contacts the mat. The heel of each hand presses against the back of the skull.Lift your hips and walk your feet in. Tuck your toes, lift your knees, and walk your feet toward your elbows until your hips stack over your shoulders and your spine is nearly vertical. Draw your shoulder blades firmly toward each other and up toward your hips to create a strong platform — your head should bear minimal weight here.Engage your core and bend one knee. On an exhale, activate your lower belly and draw one knee toward your chest, keeping the other leg grounded if you need a slower approach, or draw both knees to the chest simultaneously if you have the core control.Extend both legs upward. From the tucked position, slowly straighten both legs toward the ceiling. Press your inner feet and big-toe mounds together firmly. Flex your feet or point them — both are acceptable; consistency is what matters.Refine your vertical line. Stack ankles over hips over shoulders over wrists. Firm your quadriceps, lengthen your tailbone toward the ceiling, and keep your gaze softly forward or down at the floor. Hold for 5–15 steady breaths.Come down with control. Bend your knees and lower them back to your chest. Resist the urge to drop quickly — maintain abdominal engagement throughout the descent.Rest in Child's Pose. After coming down, rest with your forehead on the mat for at least five breaths before lifting your head to allow blood pressure to equalize.Benefits
Strengthens the deltoids, trapezius, and serratus anterior, building the shoulder stability required for arm balances and backbends.Activates the deep transverse abdominis and hip-flexor complex under load, improving axial core strength.Trains proprioception and spatial awareness by reversing your relationship to gravity.Stretches the back of the legs and lengthens the lumbar spine when the legs are fully extended overhead.Encourages diaphragmatic breathing under mild compression, refining breath control.Common Mistakes and Alignment Cues
Mistake: Dumping weight into the head and neck. Cue: Press your forearms into the floor so forcefully that you feel your shoulders lift away from your ears — the crown should be a reference point, not a weight-bearing surface.Mistake: Elbows splaying wider than the shoulders. Cue: Before you lift, slide a yoga block between your elbows and grip it lightly throughout the pose to train the correct width.Mistake: Arching the lower back with ribs flaring. Cue: Draw the front ribs down, lengthen the tailbone toward the ceiling, and imagine pressing the soles of your feet into the sky without letting the lower back compress.Mistake: Inner feet separating as fatigue sets in. Cue: Press your big-toe mounds together as though you're trying to crack a walnut between them — this also helps maintain internal leg rotation and stabilizes the pelvis.Mistake: Holding the breath. Cue: If you cannot breathe smoothly and fully, you're not yet ready for the full duration — come down and rebuild your hold time gradually.Modifications and Props
Wall support: Practice with your back 2–3 inches from a wall. This gives you a tactile reference without relying on the wall, so you build true balance rather than leaning.Strap around the upper arms: Loop a strap just above the elbows to prevent them from sliding apart, freeing your attention to focus on the legs and core.Headstand Prep only: If you're not yet inverting fully, practice Headstand Preparation Pose I — walking the feet in and holding the dolphin-like position — to build the necessary shoulder endurance before lifting the legs.Folded blanket under forearms: If the mat is too thin for comfortable forearm contact, a folded blanket under the arms (not under the head) softens pressure without compromising alignment.Cautions
Avoid or proceed only with an experienced teacher's direct supervision if you have any neck injury, cervical disc issues, or chronic neck pain — even well-executed headstands compress the cervical vertebrae.Do not practice during a menstrual cycle if you prefer to avoid inversions, and skip the pose entirely during pregnancy unless you have an established, supervised inversion practice.Those with unmanaged high blood pressure, glaucoma, or detached retina should avoid this pose.Come out immediately if you feel dizziness, pressure in the eyes, tingling in the arms, or any sharp sensation in the neck.If you're working with an injury or a medical condition, check with a qualified professional before practicing.
Related Poses
Headstand Preparation Pose I — the essential prerequisite that builds forearm and shoulder endurance.Downward-Facing Dog Pose — a preparatory shape that opens the shoulders and acclimates the body to a partially inverted position.Plow Pose — a complementary inversion and an effective counter-pose after headstand.Corpse Pose — the ideal closing pose to integrate the effects of an inversion practice.For gentler inversion-friendly sequences, see A Gentle Yoga Routine for Tired, Low-Energy Days and A 10-Move Chair Yoga Sequence for a Midday Reset.