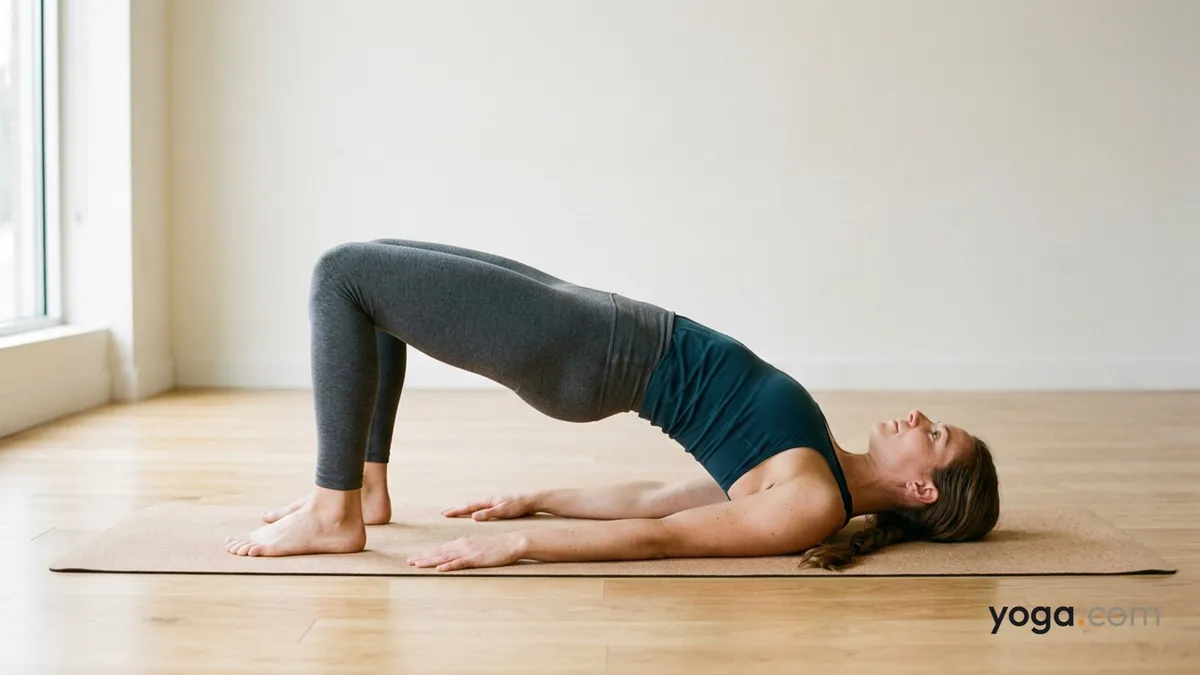
Bridge Pose on Elbows with Head Hanging is a supported backbend in which your elbows press into the mat to lift and arch the spine while the crown of the head releases freely toward the floor — a distinct variation of Setu Bandha Sarvāṅgāsana (elbows, head hanging), meaning "bridge-forming all-limbs pose." The elbow support shifts the arch higher into the thoracic spine and opens the front of the chest and throat in a way the standard bridge variation does not. Practice it toward the peak of a backbend sequence, after the spine is thoroughly warmed.
At a Glance
Level: IntermediateType: BackbendTargets: Thoracic spine, hip flexors, chest and shoulders, cervical spineGood for: Building spinal extension through the mid-back, stretching the front body from throat to hip, developing shoulder and elbow stability under loadHow to Do Bridge Pose on Elbows with Head Hanging
Lie on your back with knees bent, feet flat on the mat hip-width apart, and arms resting alongside your body.Press both elbows firmly into the mat beneath your shoulders, fingertips pointing toward the ceiling. Your upper arms and forearms form roughly a 90-degree angle.On an inhale, press down through the elbows and feet simultaneously to lift the pelvis and arch the spine upward. Let the thoracic spine dome toward the ceiling.Walk the shoulder blades toward each other and draw the chest open. The weight is distributed between both elbows, both forearms, and both feet — your head does not bear load.Allow the head to release back freely so that the crown hangs toward or lightly touches the mat. Keep the throat long; do not crunch the back of the neck.Hold for 5–8 steady breaths, pressing the elbows down to maintain the lift and breathing into the front of the chest.To come out, tuck the chin slightly toward the chest, lower the spine vertebra by vertebra back to the mat, and release the arms alongside the body.Rest in Corpse Pose for several breaths before continuing.Benefits
Stretches the hip flexors, abdomen, and intercostals along the entire front body.Strengthens the spinal extensors and gluteal muscles as they hold the pelvis elevated.Builds stability and load-bearing capacity in the shoulders and elbows.Increases extension through the thoracic spine, a region that tends toward stiffness.Lengthens the anterior cervical muscles as the head hangs freely.Encourages fuller, three-dimensional breathing by expanding the chest and rib cage.Common Mistakes and Alignment Cues
Elbows splaying outward: Press the inner edges of the elbows down and draw them toward each other to keep the forearms parallel and the chest broad.Weight dumping into the head: The head releases passively — it should feel weightless, not pressed into the floor. If you feel compression in the neck, lower the hips slightly until the head can hang free.Hips sinking unevenly: Keep both hip points lifting equally; don't let one side drop lower than the other.Feet rolling outward: Root down through all four corners of each foot and keep the inner ankles from collapsing, which stabilizes the knees and lower back.Shallow arch staying only in the lumbar: Actively broaden the collarbones and lift the sternum to encourage the curve to travel into the upper back, not just the lower.Modifications and Props
Folded blanket under the elbows: If the elbows or forearms are uncomfortable on a hard floor, place a folded blanket beneath them for cushioning without reducing stability.Block under the sacrum: For less range of motion or more support, place a block at its lowest height under the sacrum and rest there before adding the elbow lift; this lets you feel the chest-opening without full muscular demand.Feet to the wall: Press the soles of the feet against a wall at a comfortable distance to add a stable anchor if the hips tend to shift or the feet slide.Strap around the upper arms: Loop a strap just above the elbows to prevent them from sliding apart, making it easier to concentrate on the thoracic lift.Cautions
Avoid or significantly reduce the depth of this pose if you have an acute neck injury or recent cervical disc issue — the free-hanging head position puts the cervical spine in passive extension.Use care with elbow, wrist, or shoulder injuries; the forearms bear substantial load in this variation.During pregnancy, especially in the second and third trimesters, supine poses that compress the vena cava are not recommended — consult a prenatal yoga specialist.If you experience sharp pain, tingling, or numbness anywhere during the pose, come out slowly and rest.If you're working with an injury or a medical condition, check with a qualified professional before practicing.Related Poses
Bridge Pose — the foundational version to master before adding the elbow variationUpward Bow Pose — the next progression in deep backbendingCamel Pose with Palms Set Against Feet — a kneeling backbend that similarly opens the throat and thoracic spineCorpse Pose — the essential counter-pose and rest after any deep backbendFor a gentler way to work spinal mobility into your day, see A Gentle Yoga Routine for Tired, Low-Energy Days or A 10-Move Chair Yoga Sequence for a Midday Reset.