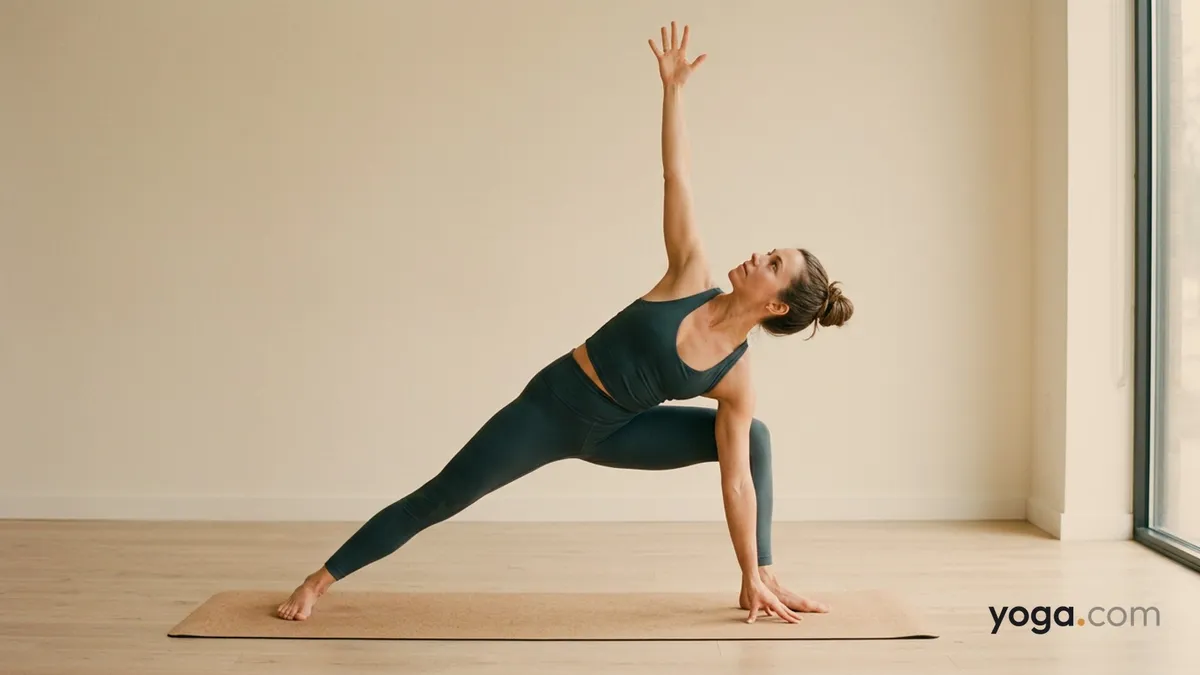
Trikoṇāsana (trik-oh-NAH-sah-nah) translates from Sanskrit as Triangle Pose. In the Bikram sequence, the posture is performed in a specific standing lunge with the forearm resting on the thigh — a detail that distinguishes it from classical triangle variations and makes it accessible to students still building lateral hip and thoracic mobility.
At a Glance
Level: BeginnerType: StandingTargets: Right hip flexors, right inner thigh (adductors), left lateral hip (abductors and IT band), obliques, thoracic spine rotation, left shoulderGood for: Hip opening, spinal rotation, lateral body lengthening, lower-body strengtheningHow to Do Bikram Triangle Pose (Right)
Coming In
Start in a wide stance. From standing, step your feet wide apart — roughly the length of one of your legs. Turn your right foot out 90 degrees so the toes point to the short edge of your mat. Turn your left foot in about 15 degrees.Bend your right knee deeply. Sink until your right thigh is parallel to the floor (or as close as your strength allows), keeping the right knee directly over the right ankle — not caving inward or pushing past the toes.Square your hips toward the front. Draw your left hip slightly forward and your right hip slightly back so both hip points face the same direction as your right toes.Place your right forearm on your right thigh. Rest the forearm across the top of the thigh, just above the knee. Do not collapse your full body weight into it — the arm is a shelf, not a crutch. Keep your right shoulder from rounding forward.Extend your left arm overhead. Reach the left arm up and over your ear, palm facing down, creating one long diagonal line from your left fingertips through your left hip and down to your left heel.Open your chest to the left. Rotate your ribcage upward, stacking the left shoulder above the right. Keep your chin neutral or turn your gaze up toward the left hand if your neck is comfortable.Press through both feet. Root the outer edge of your left foot firmly into the floor. Drive your right heel down and engage your right inner thigh to prevent the knee from collapsing inward.Hold for 20–60 seconds, breathing steadily through the nose.Coming Out
Lower your left arm, press into both feet, and straighten your right leg to rise back to your wide-stance starting position.Turn both feet forward, walk or step your feet together, and pause in Mountain Pose before moving to the left-side repetition or the next posture.Benefits
Strengthens the right quadriceps and glutes by sustaining a deep lunge position against gravity.Lengthens the left lateral hip and IT band as the left leg stays extended and the trunk shifts right.Mobilises thoracic rotation — stacking the shoulders and opening the chest demand rotation through the mid-back.Stretches the right hip flexors and inner thigh in the deep bent-knee position.Builds shoulder stability and endurance in the left shoulder through the sustained overhead reach.Improves coordination between the lower body and spine by requiring simultaneous hip stability and rotational mobility.Common Mistakes and Alignment Cues
Mistake: Right knee caves inward. Cue: Press the right knee firmly out toward the little-toe side of the foot. Imagine pushing a wall away with the inner knee.Mistake: Collapsing the torso onto the forearm. Cue: Keep a few centimetres of daylight between your ribs and thigh. The forearm guides placement; your core holds the shape.Mistake: Left shoulder rolling forward instead of opening. Cue: Rotate the left palm to face the floor and draw the left shoulder blade toward the spine to open the chest ceiling-ward.Mistake: Left heel lifting off the floor. Cue: Ground the outer edge of the left foot and engage the left quad. A slightly shorter stance width can help if the heel consistently floats.Mistake: Chin jutting forward or neck straining to look up. Cue: Keep the neck in line with the thoracic spine. Gaze forward at eye level is fine; only look up if there is no tension or compression in the neck.Modifications and Props
Forearm on thigh (standard Bikram variation): This is the intended variation. Keep the forearm lightly placed rather than leaning heavily to preserve core engagement.Hand on a block: Place a block on the outside of the right foot if you want to explore a longer side body without leaning into the thigh.Shortened stance: If the right knee tracks inward or the left heel lifts, narrow your stance slightly until you can maintain both alignment points.Chair support: Beginners can perform the pose beside a chair, resting the left fingertips on the chair back instead of reaching overhead, until shoulder and hip mobility allow the full extension.Gaze down or forward: If looking up causes neck discomfort, keep the gaze level or directed at the floor.Cautions
Approach carefully if you have acute knee pain or a recent knee injury — the deep lunge places significant load on the right knee joint.Those with hip labral issues should monitor any sharp groin or hip-socket discomfort and back out of the depth if it arises.If you experience lower-back pain with lateral flexion or rotation, reduce the range of motion and prioritise a neutral lumbar spine.Avoid the overhead reach if you have a current shoulder impingement or rotator-cuff injury; keep the left arm alongside the body instead.If you're working with an injury or a medical condition, check with a qualified professional before practicing.Related Poses
Right Triangle Pose — the classical straight-leg variation that shares the same lateral orientation and teaches the full side-body line.Warrior Pose with Right Leg Bent — builds right-leg lunge strength in a similar stance, preparing the hips and quads for Bikram Triangle depth.Warrior Pose with Right Leg Forward, Left Leg Straight — reinforces the hip and foot alignment pattern used here on the same side.Mountain Pose — the neutral standing foundation used to reset between sides and postures in the Bikram sequence.