Bikram Triangle Pose (Left) is the second side of the foundational standing triangle sequence in the Bikram 26-and-2 series. Known in Sanskrit as Trikoṇāsana (Bikram, left side) — from trikoṇa, meaning "three angles" or "triangle," and āsana, meaning "posture" — it mirrors the right-side version and is practiced immediately after it, creating balanced work through the hips, inner thighs, and lateral spine. In the heated Bikram room, it arrives mid-series as a full-body integrator, demanding coordination, strength, and steady breath simultaneously.
At a Glance
Level: BeginnerType: StandingTargets: Inner thighs and groin, lateral torso and obliques, hip abductors, shouldersGood for: Building lower-body strength and stability, lengthening the lateral spine, improving hip mobilityHow to Do Bikram Triangle Pose (Left)
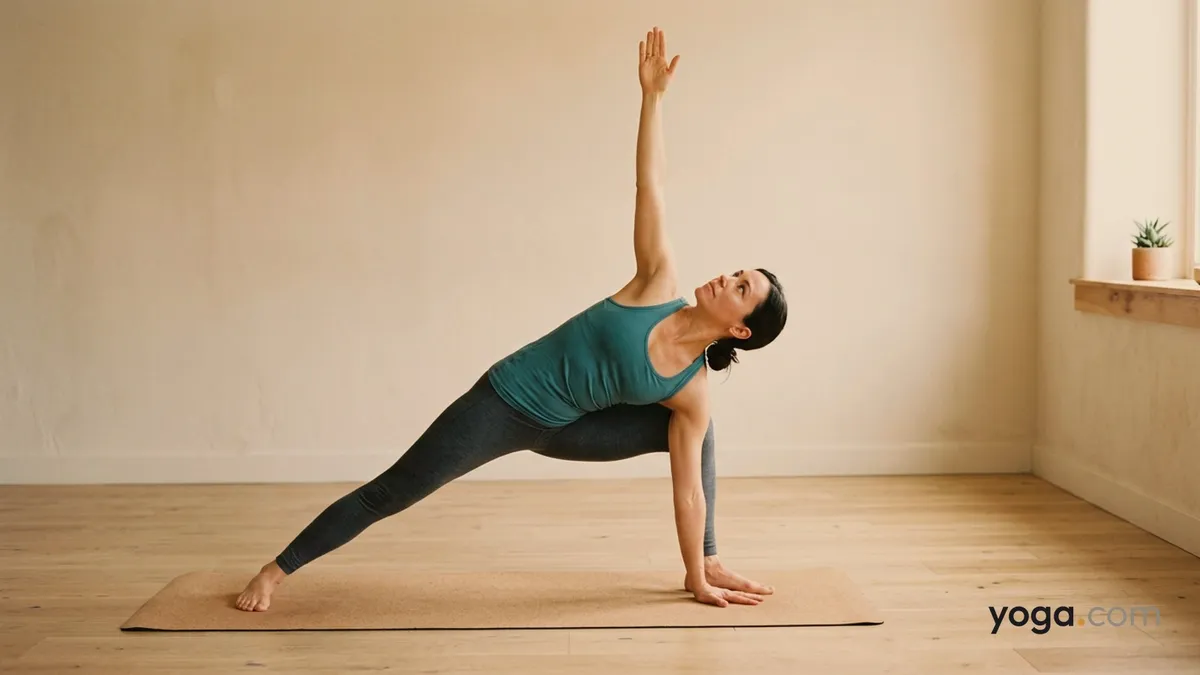
Stand with your feet approximately four feet apart, arms extended straight out to the sides at shoulder height, palms facing down — this is your Bikram standing straddle base.Turn your left foot out 90 degrees so the toes point directly to the left wall; keep the right foot facing forward or turned in very slightly. Both heels are on the same line.Bend your left knee deeply until the thigh is as close to parallel with the floor as possible, knee tracking directly over the second toe. Do not let the knee collapse inward.On an exhale, shoot your hips to the right as you send your torso laterally to the left, reaching the left arm forward and down. Place the left fingertips or palm on the floor just inside the left foot, or rest the left forearm on the left thigh if the floor is out of reach today.Sweep the right arm straight up overhead, palm facing left, forming one long diagonal line from the right fingertips through the right hip and down through the bent left knee. Stack the right shoulder directly above the left.Rotate your chest open toward the ceiling. Gaze up at the right hand, keeping the neck long and the chin away from the chest.Hold for the prescribed count — typically 10–20 seconds in a Bikram class — breathing steadily through the nose.To come out, press firmly through both feet, inhale, and use core engagement to lift the torso back to upright. Straighten the left leg. Return the arms to the T-position, then bring the feet back to parallel before transitioning to the next pose.Benefits
Strengthens the quadriceps, gluteus medius, and inner thighs of the bent (left) leg under load.Stretches the hip flexors, groin, and inner thigh of the straight (right) leg.Lengthens the lateral muscles of the torso, including the obliques and quadratus lumborum on the right side.Builds shoulder stability and endurance through sustained overhead arm extension.Trains lateral spinal mobility and helps establish even range of motion side to side when paired with the right-side version.Challenges balance and proprioception in a wide-legged stance, reinforcing ankle and knee stability.Common Mistakes and Alignment Cues
Mistake: Letting the left knee cave inward. Cue: Press the left knee firmly out toward the pinky-toe side of the foot throughout the pose; think of the knee as a arrow pointing to the left wall.Mistake: Collapsing the torso forward instead of opening it sideways. Cue: Imagine your back is pressed against a pane of glass — keep chest, hips, and both shoulders in the same flat plane.Mistake: Dropping the raised (right) arm forward or letting the shoulder roll in. Cue: Actively reach the right fingertips toward the ceiling and roll the right shoulder blade onto the back to keep the chest open.Mistake: Shortening the stance so the front thigh never approaches parallel. Cue: Take a wider step on setup; the depth of the bend is the work — a shallow stance reduces the strengthening demand on the left leg.Mistake: Gripping or scrunching the neck when gazing up. Cue: Lengthen the back of the neck first, then rotate the gaze upward; the chin stays away from the collarbone.Modifications and Props
Block under the left hand: Place a block on its highest or medium height just inside the left foot. This brings the floor up to you so you can maintain a long spine without rounding or collapsing the torso forward.Forearm on the thigh: Rest the left forearm on the left thigh instead of reaching to the floor. This reduces side-bend demand and is useful when the torso is still building flexibility.Wall for balance support: Practice with the back heel or the back of the torso lightly touching a wall to train the feeling of a flat back plane before working in open space.Reduced stance width: If the inner groin or hip is very tight, step the feet closer together — around three feet — and work toward the full range over time without sacrificing knee alignment.Cautions
Knee concerns: Go only as deep as you can with the knee tracking over the toes. Avoid if you are experiencing acute knee pain or recent knee surgery without clearance.Hip or groin strain: Reduce stance width and depth of the side bend if you feel sharp pulling in the groin; ease out of the pose if discomfort increases.Neck issues: Keep the gaze neutral — looking straight ahead rather than up — if you have cervical spine sensitivities or recent neck injury.Low back pain: Engage the core and avoid compressing the lower back by reaching long through the top arm rather than dropping the torso heavily toward the floor.If you're working with an injury or a medical condition, check with a qualified professional before practicing.
Related Poses
Mountain Pose — grounding posture for stance and alignment awareness before the series begins.Right Triangle Pose — the direct counterpart; always practiced as a pair with the left side for balanced hip and spinal work.Warrior Pose with Right Leg Bent — builds similar deep-knee-bend strength and hip stability as preparation.Mountain Pose with Upward Stretch — introduces overhead arm extension and lateral lengthening, a natural lead-in to Triangle.Put Triangle Pose to use in a full practice: see A Gentle Yoga Routine for Tired, Low-Energy Days or take a break at your desk with A 10-Move Chair Yoga Sequence for a Midday Reset.