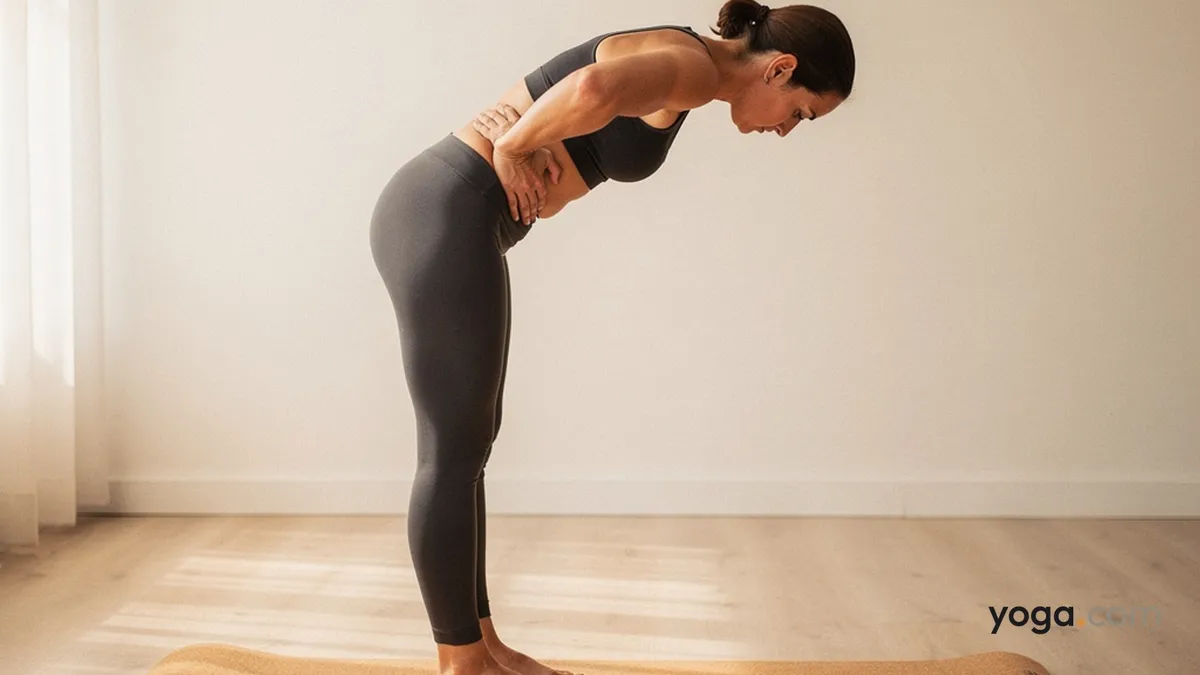
Forward Bend with Hands Against Back is a standing forward fold in which both palms rest flat against the sacrum and lumbar spine as you hinge forward from the hips. Its Sanskrit name is Uttānāsana (hands on back) — ut meaning intense, tān meaning stretch, and āsana meaning posture. The hand placement makes this a particularly accessible entry point into forward bending, offering gentle traction through the lower back and encouraging students to initiate the fold from the hips rather than the waist.
At a Glance
Level: BeginnerType: Forward BendTargets: Hamstrings, lumbar spine, gluteal muscles, thoracic spineGood for: Establishing hip-hinge mechanics, lengthening the posterior chain, building body awareness in spinal positionHow to Do Forward Bend with Hands Against Back
Stand in Mountain Pose (Tadasana) with your feet hip-width apart and arms at your sides. Root evenly through all four corners of each foot.Bring both hands to your lower back — palms flat, fingers pointing downward toward the sacrum. Press the heels of your hands gently into the flesh on either side of the spine.On an inhale, lengthen through the crown of your head and draw the front ribs slightly in to avoid flaring the chest.On an exhale, hinge forward from your hip creases — not your waist. Lead with your sternum, keeping the spine long rather than rounding immediately.Continue folding until you feel a firm stretch across the backs of your thighs. Maintain a soft micro-bend in the knees if the hamstrings are tight; do not lock the knee joints.Let your head hang naturally so the back of the neck stays long. Keep the hands pressed against the sacrum throughout, using the contact as feedback to sense whether the pelvis is tilting forward.Hold for 5–8 slow breaths, softening the belly toward the thighs with each exhale.To come out, engage the core gently, press the feet into the floor, and rise on an inhale by reversing the hinge — spine long, hips leading — until you return to standing.Benefits
Stretches the hamstrings and calf muscles along the entire posterior leg line.Lengthens the erector spinae and thoracolumbar fascia along the back of the torso.Trains the hip-hinge pattern by making the hip crease the fulcrum of the fold.Builds proprioceptive awareness of pelvic tilt through the tactile feedback of hands on the sacrum.Encourages axial elongation of the spine, creating space between lumbar vertebrae as you descend.Strengthens the glutes and hamstrings isometrically as they work to support a controlled descent and return.Common Mistakes and Alignment Cues
Rounding from the waist instead of hinging at the hips: Before you fold, visualize your sit bones lifting toward the ceiling. If your lower back rounds immediately, reduce your range of motion and bend the knees more.Letting the hands slide up the spine mid-fold: Keep the palms anchored on the sacrum throughout; drifting hands usually signal that the pelvis has stopped tilting and the lumbar spine is compensating.Locking the knees: A soft bend in the knee joints allows the pelvis to tilt more freely and reduces strain on the joint; straighten only as the hamstrings open over time.Collapsing through the chest: On each inhale, think about widening across the collarbones and keeping the neck long, allowing the head to release naturally, to keep the front body open.Holding the breath on the descent: Exhale as you fold deeper; this releases tension in the posterior chain and prevents gripping around the lower back.Modifications and Props
Yoga blocks under the hands: If reaching the sacrum strains your shoulders, place two blocks at the height that works and rest your hands there instead, maintaining the same hip-hinge intention.Wall support: Stand with your sit bones resting against the wall, place your palms on the sacrum, and hinge forward until your torso is roughly parallel to the floor. This version is excellent for new students still developing body awareness.Bent-knee variation: Generously bend both knees, allowing the belly to rest on the thighs. This reduces hamstring demand and lets the spine release without strain.Chair support: For students who cannot safely stand and fold, a seated version on the edge of a chair — hinging forward with palms on the lumbar spine — offers the same hip-hinge training with added stability.Cautions
Hamstring or calf strain: Keep a generous bend in the knees and limit depth until the tissue has warmed and lengthened.Disc issues or recent back surgery: A neutral spine is essential; avoid any version that causes rounding in the lumbar region, and consider working with a supported, shallower fold only.Low blood pressure or dizziness: Rise slowly from the pose, pausing with hands on thighs before returning fully upright.Pregnancy (second and third trimester): Keep the feet wider than hip-width to give the abdomen space, and avoid compressing the belly.If you're working with an injury or a medical condition, check with a qualified professional before practicing.
Related Poses
Mountain Pose — the grounding starting point before you fold.Standing Forward Bend — the natural next step once the hip-hinge pattern is established.Intense Left Stretch with Hands Behind Back in Namaste — a progression that combines forward folding with a more demanding arm and shoulder position.Downward-Facing Dog Pose — a complementary lengthening of the posterior chain and a good counter-movement after this fold.Put this pose to use in a full practice: A Gentle Yoga Routine for Tired, Low-Energy Days or A 10-Move Chair Yoga Sequence for a Midday Reset.