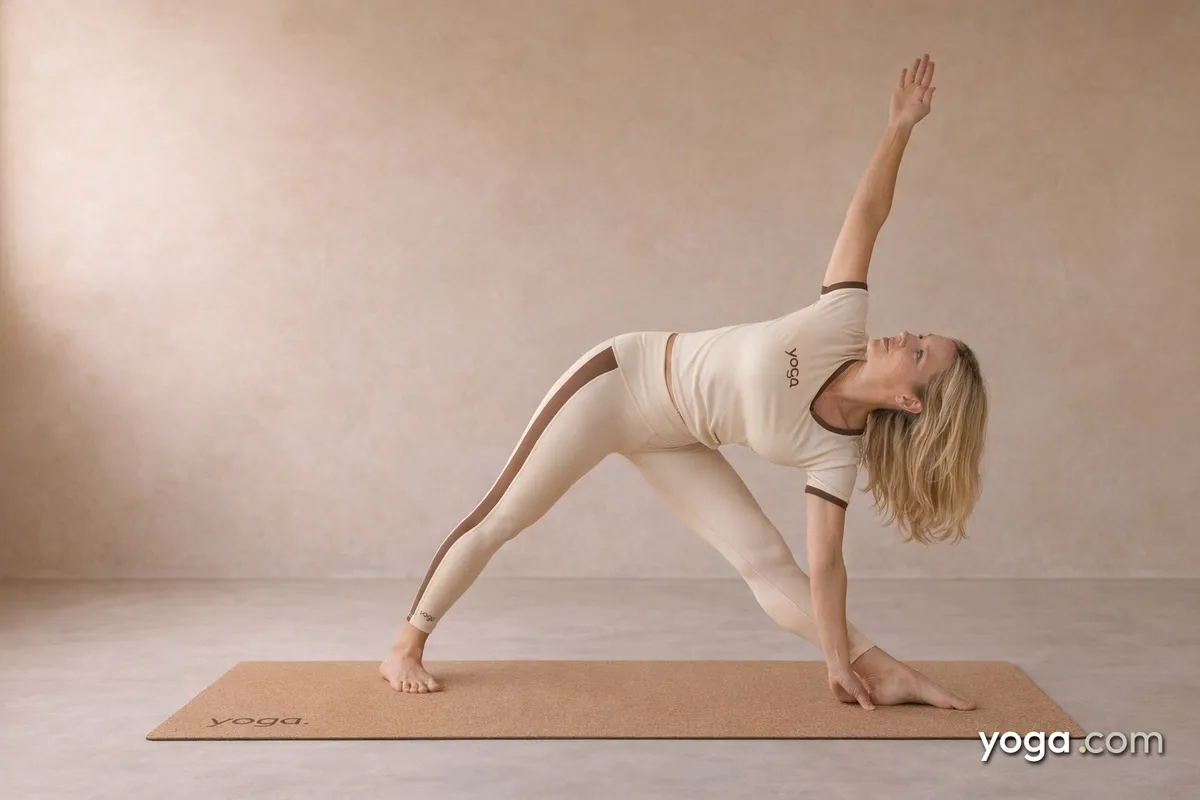
Revolved Triangle Pose with Right Arm Behind Left Foot is a standing twist that brings the right hand to the outside of the left foot while the left arm extends overhead - the mirror of the more common left-hand variation. Known in Sanskrit as Parivrtta Trikoṇāsana (right arm to left foot), literally "revolved triangle pose," it combines a deep spinal rotation with a significant hamstring and hip lengthening. It appears naturally after standing poses warm the legs and before deeper twists demand more from the spine.
At a Glance
- Level: Intermediate
- Type: Twist
- Targets: Thoracic spine, hamstrings, hip external rotators, obliques
- Good for: Building rotational range in the mid-back, lengthening the posterior chain, developing single-leg balance and stability
How to Do Revolved Triangle Pose with Right Arm Behind Left Foot
- Set your foundation. Stand in Mountain Pose at the top of your mat. Step your right foot back approximately 3-3.5 feet, placing it at roughly a 45-degree angle. Your left foot points straight forward, left hip is forward, right hip drawn slightly in.
- Square your hips. Draw your right hip forward and your left hip back so both hip points face the front of the mat as evenly as possible. Press down through the outer edge of your right foot to anchor the back leg.
- Lengthen before you revolve. Inhale and reach your arms out to the sides at shoulder height. On an exhale, hinge forward at the left hip - keeping the spine long - until your torso is roughly parallel to the floor or your right hand can reach toward a block outside the left foot.
- Place your right hand. Bring your right hand to the floor or a block on the outside of your left foot. Press firmly through all four corners of the right hand to create a stable base.
- Begin the twist. On an inhale, rotate your torso to the left, drawing your left shoulder back and your right shoulder forward. Keep your left hip drawing back to maintain hip alignment as you revolve.
- Extend the top arm. Stretch your left arm straight up, stacking the left shoulder over the right. Turn your gaze up toward your left hand, or keep it neutral toward the floor if the neck is strained.
- Hold and breathe. Stay for 5-8 full breaths. With each inhale, lengthen the spine; with each exhale, deepen the rotation without forcing.
- Come out with care. Lower the left arm, bring both hands to the hips, and on an inhale press through both feet to rise. Step your right foot forward and pause in Mountain Pose before switching sides.
Benefits
- Stretches the hamstrings and calf of the front (left) leg
- Mobilizes the thoracic spine through active rotation
- Strengthens the obliques, erector spinae, and stabilizing muscles of the standing leg
- Lengthens the hip flexors and external rotators of the back (right) leg
- Builds proprioceptive awareness and single-leg balance
- Engages the shoulder girdle and mid-back muscles to maintain the arm extension
Common Mistakes and Alignment Cues
- Collapsing through the lower back: Keep a slight engagement of the front (left) hip as you hinge; avoid rounding the lumbar to reach the floor - use a block instead.
- Back heel lifting: Ground the outer edge of the right foot firmly; if the heel floats, shorten your stance or practice with the heel at a wall.
- Twisting from the lower back instead of the thoracic spine: Think of rotating the ribcage away from the left thigh rather than yanking the shoulder back.
- Hips rotating open: Actively draw the left hip back and the right hip forward throughout the pose to maintain as much parallel alignment as your body allows.
- Straining the neck: Only look up if the cervical spine is comfortable; gazing forward or down is equally valid.
Modifications and Props
- Block under the right hand: Place a block at its tallest height on the outside of the left foot. This raises the floor and lets you maintain spinal length without collapsing.
- Hand to shin: If a block is unavailable, rest the right hand lightly on the left shin - this reduces the range but preserves the rotation.
- Back heel to the wall: Press the right heel into a wall for extra stability. This makes it easier to ground the back foot and focus on the spinal twist.
- Shortened stance: A narrower distance between feet reduces hamstring demand. Start here if the back heel lifts or the lower back rounds significantly.
Cautions
- Spinal disc issues: Proceed with caution if you have a herniated or bulging disc; avoid deep forward bending combined with rotation until cleared by a professional.
- Hamstring injury: Microbend the front knee and use a block to reduce strain at the left sit bone attachment.
- Low blood pressure or vertigo: Come up slowly and avoid dropping the head below the heart for extended periods.
- Sacroiliac joint sensitivity: Keep the front knee very slightly soft and avoid forcing the hips into parallel alignment.
If you're working with an injury or a medical condition, check with a qualified professional before practicing.
Related Poses
- Bend to Left Leg with Rotation - a seated preparation that introduces the same rotation with less demand on balance
- Revolved Side Angle Pose with Rotation to Right Leg - a natural next progression with a bent front knee for more rotational depth
- Left Twist with Left Leg Bent - a grounded twist that reinforces the thoracic rotation pattern
- Downward-Facing Dog Pose - an effective counter-pose to decompress the spine and re-lengthen the hamstrings after the twist
Looking to weave standing twists into a full practice? See A Gentle Yoga Routine for Tired, Low-Energy Days or try the compact A 10-Move Chair Yoga Sequence for a Midday Reset.