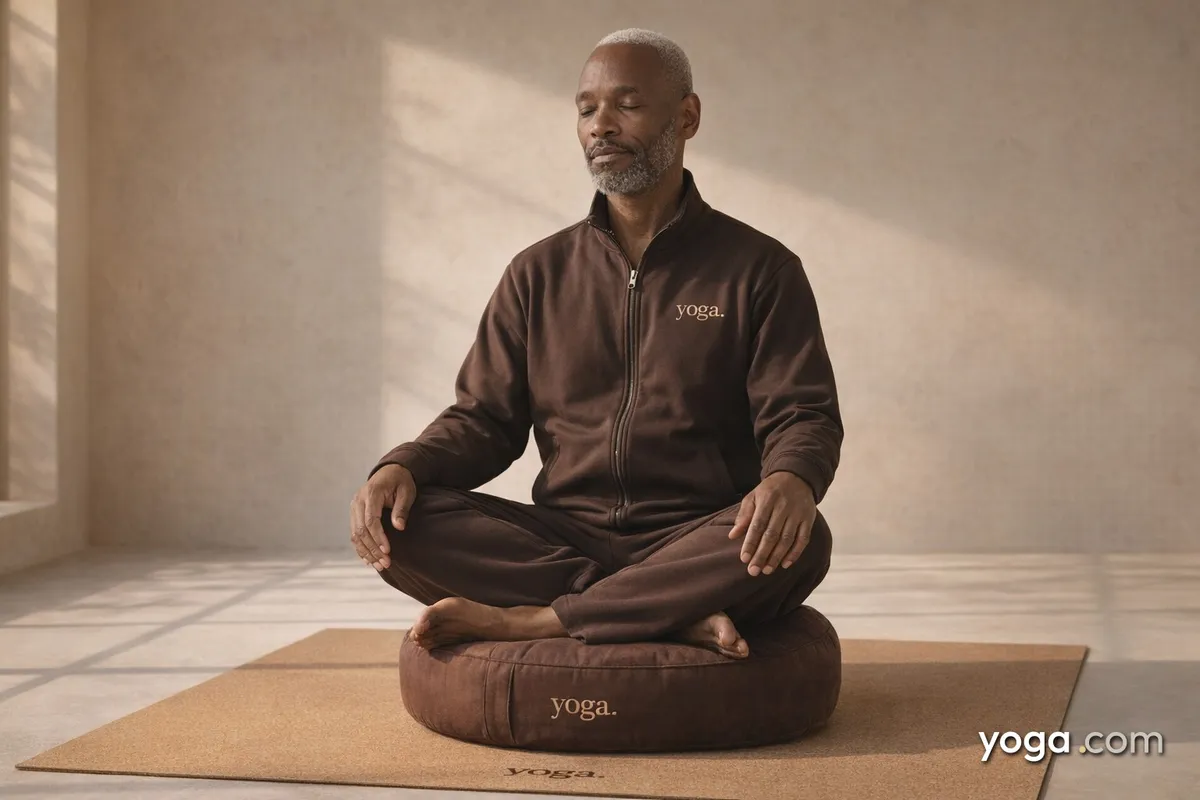
Perfect Pose (Siddhāsana, literally "pose of the adept" or "accomplished pose") is a classical seated meditation posture in which the legs are crossed with each heel drawn toward the body's midline. Held in high esteem across many yoga lineages, it sits alongside Lotus Pose as one of the primary seats for pranayama and meditation practice. Its relatively accessible leg position makes it a natural starting point for practitioners building the hip openness and spinal length that longer sits require.
At a Glance
- Level: Beginner
- Type: Seated
- Targets: Hip flexors, inner groins, adductors, spinal erectors
- Good for: Establishing upright seated posture, steadying breath awareness, building hip mobility for deeper cross-legged positions
How to Do Perfect Pose
- Start seated on the floor. Sit on your mat with your legs extended in front of you (Dandasana). If your lower back rounds, place a folded blanket or firm block under your sitting bones so your pelvis can tilt slightly forward.
- Bring the first foot in. Bend your left knee and draw the left heel toward your perineum, resting the outer edge of the left foot on the mat. The left ankle sits just in front of the right shin.
- Place the second foot. Bend your right knee and lift the right foot, sliding it over the left ankle so the right heel rests directly above the left heel, close to the pubic bone. The outer edge of the right foot can rest in the crease between the left calf and thigh.
- Root through your sitting bones. Press both sitting bones evenly into the support beneath you. Draw the lower belly gently in and up to support the lumbar spine without gripping.
- Lengthen your spine. Stack your head over your shoulders over your hips. Broaden across the collarbones, slide the shoulder blades lightly down the back, and lift the crown of the head toward the ceiling.
- Set your hands. Rest the backs of your hands on your knees with the index finger and thumb touching (Jnana Mudra), or place your palms face-down on your thighs - whichever supports a relaxed, open chest.
- Soften your face and settle your gaze. Allow the eyes to close or lower the gaze to the floor a few feet ahead. Breathe naturally and hold the seat for your intended duration.
- To come out: Uncross the legs and return to Dandasana. Shake the legs out gently, then repeat with the opposite leg on top if you plan a second side or a longer sit.
Benefits
- Stretches the hip flexors, inner groins, and adductors over time
- Trains the spinal erectors to sustain an upright position without the support of a chair back
- Grounds the pelvis in a stable base that supports diaphragmatic breathing
- Builds the ankle and knee tolerance needed for longer meditation sits
- Encourages awareness of spinal alignment that carries over into standing and dynamic poses
Common Mistakes and Alignment Cues
- Rounding the lower back: If the pelvis tucks under and the low back collapses, sit higher - add a second blanket or a firmer block until the natural lumbar curve is present.
- Knees floating far above the hips: Raised knees signal tight hips, not a problem to force through. Use props under the thighs and work toward the floor gradually over weeks.
- Collapsing one shoulder forward: Check that both shoulder blades draw evenly toward the spine; a wall behind you can provide real-time feedback on symmetry.
- Clenching the jaw or brow: Tension in the face travels into the neck and shoulders. Consciously soften the forehead, jaw, and tongue at the start of each sit.
- Holding the breath: The pose is a seat for breathing, not a static shape to endure. If you find yourself bracing, back off the uprightness slightly and let the breath move freely.
Modifications and Props
- Folded blankets or a meditation cushion: The single most effective modification - sit on enough height that your knees drop below your hip creases and your pelvis tilts naturally forward.
- Blocks under the thighs: If the outer thighs and knees hover in the air, slide a block or rolled blanket under each thigh for support so the hip muscles can release without strain on the knee joint.
- Wall support: Sit with your back a few centimeters from a wall. Touch the wall only if you lose the curve; use the proximity as a postural check rather than a crutch.
- Chair adaptation: Sit toward the front edge of a chair, feet flat on the floor, and cross the ankles. This provides a similar upright-spine experience while you work toward floor sitting over time.
Cautions
- Knee discomfort: Any sharp or pinching sensation in the knee joint means the hip is not yet open enough for this position. Back off, add more height, or work with Bound Angle Pose first.
- Sciatica or lower-back pain: A posteriorly tilting pelvis in seated poses can aggravate sciatic symptoms. Sit on substantial height and shorten the sit duration until the pelvis can stay neutral.
- Ankle sensitivity: The crossed heels place direct pressure on the ankles. Place a thin folded cloth under the heels if pressure is uncomfortable.
- Recent hip or groin surgery: Avoid deep external-rotation positions until cleared by your care provider.
If you're working with an injury or a medical condition, check with a qualified professional before practicing.
Related Poses
- Bound Angle Pose - an accessible preparation that opens the inner groins and adductors
- Cow Face Pose (Left Leg and Right Arm Up) - deepens hip external rotation needed for comfortable cross-legged sitting
- Lotus Pose - the natural next progression once the hips are fully prepared
- Corpse Pose - a complementary closing posture after any sustained meditation seat
Put Perfect Pose to use in a full practice: A Gentle Yoga Routine for Tired, Low-Energy Days or try the accessible seated format in A 10-Move Chair Yoga Sequence for a Midday Reset.