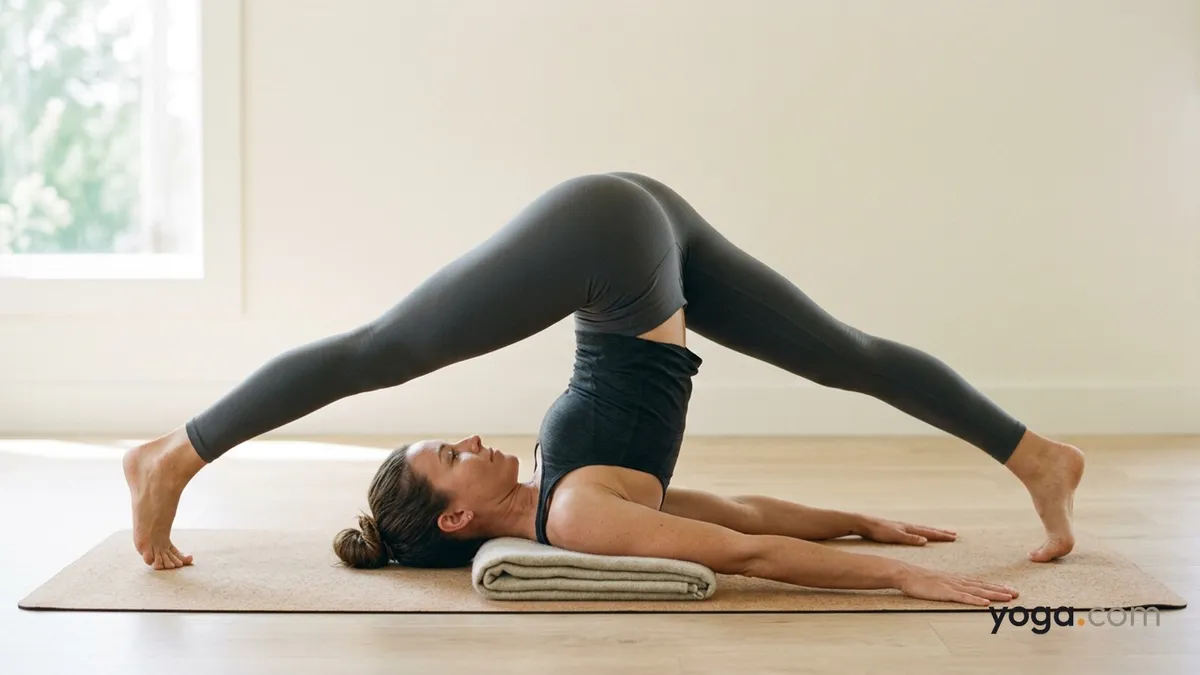
Great Plow Pose (Mahā Halāsana — mahā meaning "great" or "mighty," hala meaning "plow") is an advanced inversion that takes the classic Plow Pose significantly further by lowering the arms overhead along the floor and extending the legs as wide apart as possible, deepening the spinal flexion and the demand on posterior-chain flexibility. It belongs to the shoulder-stand family of inversions and typically appears near the end of a practice, after the spine and hamstrings are thoroughly warmed.
At a Glance
Level: AdvancedType: InversionTargets: Cervical and thoracic spine, hamstrings, inner groins, shoulder girdleGood for: Developing deep spinal flexion, lengthening the posterior chain, building body awareness in an inverted positionHow to Do Great Plow Pose
Begin lying on your back with your arms alongside your body, palms pressing down. Draw your knees to your chest and roll your hips off the floor, entering Shoulderstand or moving directly into Plow Pose (Halāsana) with toes resting on the floor behind your head.Establish a stable foundation: press the tops of your shoulders firmly into the mat, draw the shoulder blades toward each other, and lengthen the back of your neck so it does not flatten completely against the floor. Place your hands on your lower back for support.Release the hands from your lower back and slowly extend both arms along the floor overhead — in the same direction your toes point — keeping the palms face-down or interlaced. This is the "great" element that distinguishes the pose from standard Plow.With the arms extended, begin to walk the feet wide apart in opposite directions, moving each foot as far out to the side as your hamstring and groin flexibility allows. The goal over time is to bring each arm alongside its corresponding leg, but do not force the width.Actively reach through all ten toes, pressing the balls of the feet into the mat to engage the legs and protect the lumbar spine. Keep a mild, deliberate curve in the thoracic spine rather than collapsing it.Breathe slowly and evenly. Hold for 5–15 breaths, maintaining the shoulder-to-mat connection and a long neck throughout.To come out: Walk the feet back to center, rebend the knees, and slowly roll the spine down vertebra by vertebra to the floor, supporting the lower back with the hands if needed. Rest in Corpse Pose (Śavāsana) for several breaths before sitting up.Benefits
Stretches the hamstrings and inner groin muscles across a wide range of motionLengthens the erector spinae and thoracic extensor muscles through deep spinal flexionStrengthens the posterior shoulder girdle and upper back as the arms press into the floor without spinal supportImproves mobility in the cervical and thoracic spine under axial loadBuilds proprioceptive awareness and body control in a fully inverted positionCommon Mistakes and Alignment Cues
Mistake: Collapsing the weight onto the neck. Cue: Keep pressing the tops of the shoulders down and create space between the back of your skull and your upper back — the neck should hover, not pancake.Mistake: Forcing the legs wider than available flexibility allows. Cue: Walk the feet only as far apart as you can while keeping the toes or balls of the feet grounded and both sides of the pelvis even.Mistake: Holding the breath. Cue: The compression of this position makes breathing feel restricted — actively lengthen the exhale to stay calm and ease the chest open.Mistake: Releasing the arm-and-shoulder foundation when reaching overhead. Cue: As the arms extend forward, re-anchor the shoulder blades and maintain the lift of the upper chest; do not let the ribcage drop toward the chin.Mistake: Bending the knees to get the feet to the floor. Cue: Straight legs are integral to the pose; if the feet do not reach, stay with standard Plow and continue building hamstring length.Modifications and Props
Blanket under the shoulders: Fold one or two firm blankets and place them under your shoulders (not your head) to protect the cervical curve. This is strongly recommended for most practitioners.Feet on a chair or block: If hamstring tightness prevents the toes from reaching the floor in standard Plow, rest the feet on the seat of a chair behind you before attempting any arm or leg variations.Arms remain on the lower back: Keep the hands supporting the lower back and only separate the legs wide — this reduces demand on the shoulder girdle while still exploring the groin stretch.Partial leg separation: Walk the feet only hip-distance or slightly wider apart rather than attempting maximum width; this lets you build the pattern safely over many sessions.Cautions
Avoid this pose if you have a neck or cervical spine injury; inversions place direct compressive load on the cervical vertebrae.Do not practice during menstruation if you prefer to avoid full inversions, and avoid entirely during pregnancy.People with high or unmanaged blood pressure, glaucoma, or detached retina should not practice inversions without medical clearance.If you feel sharp pain, tingling, or numbness in the arms, neck, or hands, come out of the pose immediately.If you're working with an injury or a medical condition, check with a qualified professional before practicing.Related Poses
Plow Pose — the direct foundation for this pose; master it before attempting the "great" variation.Easy Plow Pose — a gentler entry point in the same family, useful for building the shoulder-and-neck foundation.Ear Pressure Pose — a natural next progression from Plow that deepens spinal flexion.Bridge Pose — an accessible counter-pose and warm-up that moves the spine through extension after deep flexion.For lower-intensity sequences that complement an inversions practice, see A Gentle Yoga Routine for Tired, Low-Energy Days and A 10-Move Chair Yoga Sequence for a Midday Reset.