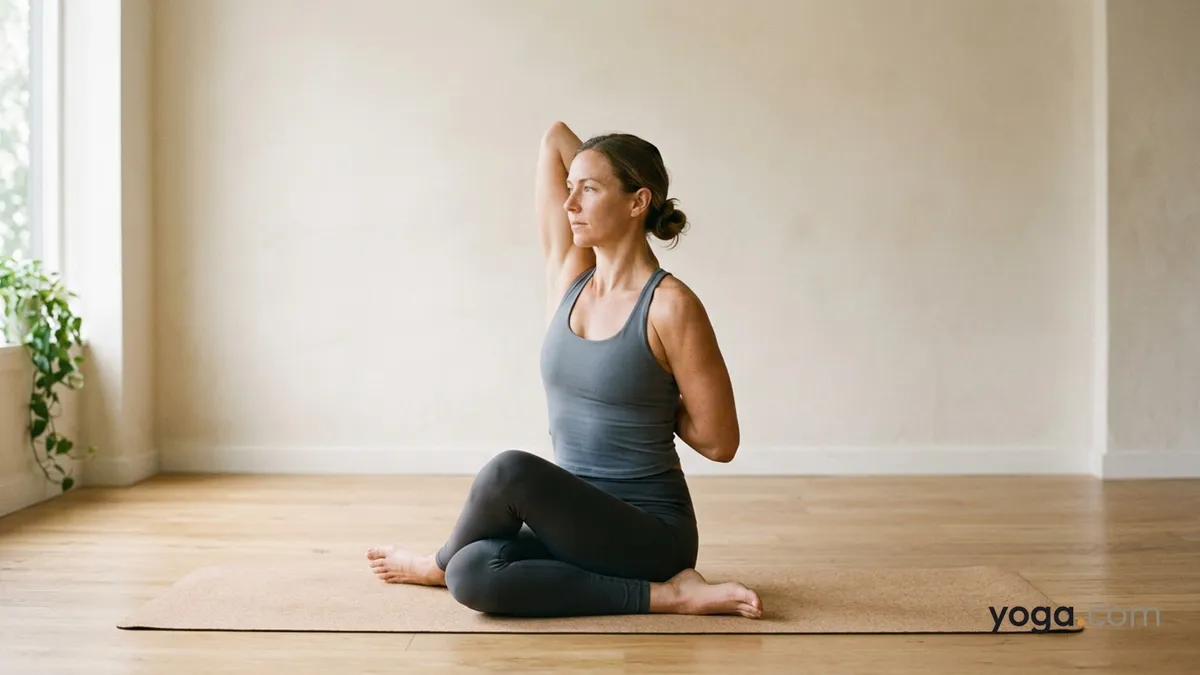
Cow Face Pose with Right Hand Up Grab is a deep seated hip and shoulder opener in which the legs stack in a symmetrical crossed position while the arms bind behind the back — right arm reaching down from above, left arm reaching up from below. Its Sanskrit name, Gomukhāsana (right hand up, clasp), translates literally as "cow face pose," a reference to the shape the stacked knees and crossed arms create when viewed from the front. It fits naturally in the middle or cool-down phase of a practice, after the body has built some warmth.
At a Glance
Level: IntermediateType: SeatedTargets: Hips (external rotators), shoulders, triceps, chestGood for: Building shoulder mobility, deepening hip external rotation, improving postural awarenessHow to Do Cow Face Pose with Right Hand Up Grab
Begin seated on the floor with your legs extended. Bend your knees and slide your left foot under your right knee, bringing the left foot toward the right hip. Stack your right knee directly on top of your left knee, right foot moving toward the left hip. Flex both feet to protect the knee joints.Shift your weight evenly across both sitting bones — use a folded blanket under your hips if one side lifts. Sit tall, lengthening through your spine.Inhale and raise your right arm straight overhead. Bend your right elbow, letting the right hand drop down the center of your back, palm facing your spine.Bring your left arm out to the left side at shoulder height, then rotate it internally so the thumb points toward the floor. Bend the left elbow and sweep the left forearm up the center of your back, palm facing away from your spine.Work the two hands toward each other. If they meet, clasp the fingers firmly. Keep the right elbow pointing straight up toward the ceiling and the left elbow pointing directly down toward the floor.Draw the right elbow back slightly so it doesn't flare forward. Broaden across the collarbones and keep the front ribs from jutting out. Gaze forward at a soft, neutral point.Hold for 5–10 steady breaths, maintaining even pressure across both sitting bones and length through the sides of your torso.To come out, release the arm bind first, then uncross your legs and shake them out gently. Repeat on the second side (left leg on top, left arm raised) to balance the practice.Benefits
Stretches the external hip rotators, including the piriformis and gluteus medius, of both hips simultaneously.Lengthens the triceps and the posterior capsule of the shoulder of the arm reaching down (right side here).Stretches the pectoral muscles and the front of the shoulder of the arm reaching up from below (left side here).Builds shoulder stability and range of motion by working both glenohumeral joints in opposing directions.Strengthens the postural muscles of the thoracic spine as they resist the asymmetrical pull of the arm bind.Develops body awareness and proprioception in the shoulders and hips under load.Common Mistakes and Alignment Cues
Knees not stacked: If the top knee sits wide or forward, the hip stretch is diluted. Work both knees toward the midline so they align one directly above the other.One sitting bone lifting: Tipping to one side compresses the lower hip and reduces the stretch. Place a folded blanket under the lifted hip until both sides sit evenly.Top elbow flaring forward: This closes the chest and strains the shoulder. Draw the top elbow back until it points straight up, and broaden across the upper chest.Ribs thrusting forward to force the bind: Jutting the ribs compresses the lower back. Keep the front ribs knitting inward and reach from the shoulder blade, not by arching.Gripping the clasped hands and losing breath: Ease the grip just enough to breathe fully. Tension in the hands often travels up into the neck — soften the jaw and throat.Modifications and Props
Strap for the arm bind: If your hands don't reach each other, hold a strap between them. Walk the hands closer along the strap over time as shoulder mobility improves.Blanket under the hips: Sitting on a folded blanket or a block tilts the pelvis forward, making it easier to stack the knees and sit evenly. This is especially useful on tight days.Seated in a chair: Sit toward the front of a chair, cross the right knee over the left knee at a comfortable angle, and practice the arm bind alone. This removes the floor hip demand entirely while still working the shoulders.Legs uncrossed: Sit in a simple cross-legged position — or even with legs straight — and practice only the arm bind. Isolating the shoulders lets you focus on alignment before adding the hip complexity.Cautions
Knee discomfort: If you feel sharp or pinching pain in either knee (rather than a muscular pull at the hip), ease out of the leg position. Forcing the stack can stress the knee ligaments and menisci.Shoulder impingement or rotator cuff strain: Avoid the full arm bind if you have acute shoulder pain. Work with a strap held loosely, or practice only the hip portion of the pose.Sciatica: Raising the hips on a blanket reduces the intensity on the sciatic nerve. Back off if you feel any radiating or tingling sensation down the leg.Neck tension: Keep the head centered over the spine. Avoid letting the top elbow pull the head to one side.If you're working with an injury or a medical condition, check with a qualified professional before practicing.
Related Poses
Bound Angle Pose — opens the hip adductors and groin, preparing the hips for the crossed-leg position.Cow Face Pose (Left Leg and Right Arm Up) — the mirrored variation; always practice both sides for balance.Downward-Facing Dog Pose — builds the shoulder mobility and external rotation needed for the arm bind.Lotus Pose — a natural next progression once hip external rotation from Gomukhāsana is established.For a practice that incorporates this pose alongside gentler seated work, see A Gentle Yoga Routine for Tired, Low-Energy Days. If you prefer a shorter format, the A 10-Move Chair Yoga Sequence for a Midday Reset includes accessible shoulder and hip variations you can explore.