You grab your mat, roll it out, and push the blocks to the side - because props are for people who "can't do the pose yet," right? Not even close. Props are precision tools, and knowing how to use them well is one of the fastest ways to practice smarter, feel better in your body, and protect yourself over the long haul.
Props Aren't a Shortcut - They're the Point
The tradition of using props in yoga runs deep. Iyengar Yoga is defined by precision, alignment, and the deliberate use of props - and B.K.S. Iyengar's approach transformed who could practice. Because of that work, people of all ages and health conditions can perform asanas with greater ease.
When most classes were Iyengar-influenced, teachers consistently emphasized props - blankets, blocks, straps - to correct poor alignment habits, develop strength, and help students experience poses more deeply. That philosophy is just as relevant today.
Your Core Props and What They Each Do
Blocks
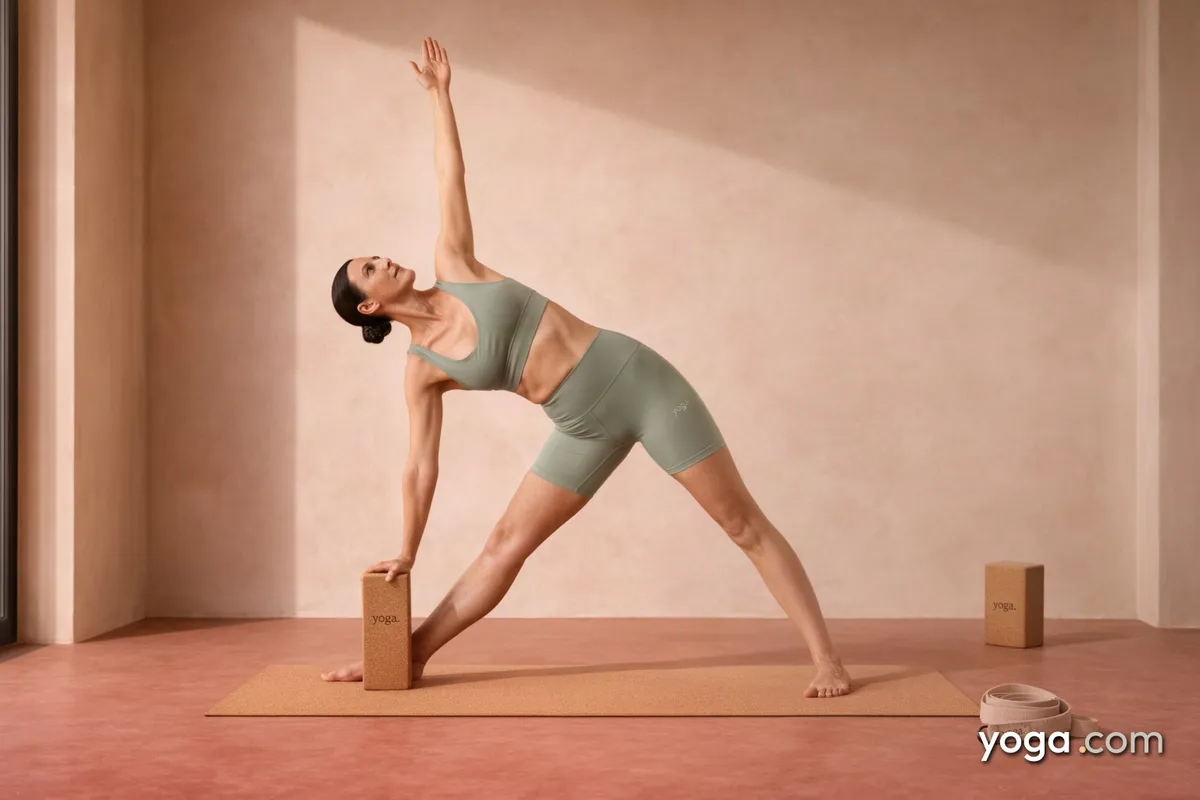
Blocks typically come in foam, cork, or wood. Each has three heights - tall, medium, and flat - giving you six inches, four inches, or three inches of lift depending on how you orient them. In almost any yoga class, it's beneficial to have two blocks within reach. Firmer materials like cork give your hands more to press into, which sharpens proprioceptive feedback.
Straps
A strap is an excellent tool for extending the reach of your arms in poses like Seated Forward Bend (Paschimottanasana) or Extended Hand-to-Big-Toe Pose (Utthita Hasta Padangusthasana), allowing for better integration and alignment without rounding your spine to compensate.
Blankets and Bolsters
Blankets pad bony joints, lift hips, and support the neck. Bolsters hold your body in open, passive shapes so your muscles can fully release. Restorative poses are passive postures fully supported by props - no muscular effort required, with no goal of stretching or strengthening.
Blocks in Standing Poses: More Length, Not Less Work
Placing a block under your hand doesn't mean you are avoiding the pose. It means you are doing the pose correctly.
Take Half Standing Forward Bend (Ardha Uttanasana). Having more height beneath your arms ultimately allows for more length in your spine, regardless of whether you have tightness in your lower back or hamstrings. A rounded spine straining toward the floor is not the pose, and a long spine is what you are actually working toward, so keep in mind that the block is there to help you find that length and not to make the pose easier for you.
In a Standing Forward Bend (Uttanasana), a block actively engages your legs. A block can bring students into leg engagement and alignment very quickly - because if the legs are passive, the lower back tends to take the hit. On top of that, when your legs are passive your lower back carries a load it should not have to carry, and so using a block helps you protect your lower back by keeping your legs active and working.
- Start with the block on its tallest setting and lower the block only when your spine stays long.
- Press your fingertips into the block, because that pressure feedback helps you lift your chest.
- The goal for you is a long, open side body, not simply getting your hand to touch something.
Straps in Seated and Supine Poses: Reach Without Rounding
If you're looping a strap around your foot in Seated Forward Bend and you are still rounding your entire back just to reach the strap, your grip is too long. Shorten the strap. Hold the strap at a length where you feel mild resistance, sit tall, and then hinge forward from your hip creases - not from your mid-back. A grip that is too long will always pull your spine into a rounded shape, stopping the strap from doing its job because your back is doing the wrong work.
Adding a folded blanket underneath the hips in seated forward bends allows the spine and breath to stay lengthened while entering the pose - and over time you can gradually reduce the height as your hamstrings open. Keep in mind that pairing a blanket with a strap gives your practice a genuinely sustainable foundation and so both props together are worth using at the same time.
In a supine hamstring stretch, the strap keeps your lifted leg straight while your opposite hip stays grounded. If that opposite hip is lifting off the floor, the stretch is not going where the stretch should go. Keep your elbows soft when you hold the strap and do not haul hard on the strap, because hauling hard on the strap just rounds your upper back and defeats the whole purpose of using the strap in the first place.
One important note: if you feel sharp, shooting pain down the back of your leg, ease off immediately and consult a healthcare professional before continuing.
Blankets in Shoulderstand: A Detail That Matters for Your Neck
Shoulderstand (Salamba Sarvangasana) is one of the poses where skipping a prop isn't just uncomfortable - it can be genuinely risky over time.
Blankets in Shoulderstand are believed to maintain the cervical curve of the neck, which is a lordotic curve - meaning the vertebrae curve toward the front of the body. Regularly practicing Shoulderstand without support is thought to potentially flatten that curve over time.
Stacking a blanket or two under the shoulders - with the head on the floor - can work wonders to release pressure in the cervical spine, an area that can be uncomfortable and even susceptible to injury. The number of blankets you need is personal, but generally somewhere between two and four.
A Block in Bridge Pose: Stability You Can Feel
Bridge Pose (Setu Bandha Sarvangasana) looks straightforward - but alignment details make a real difference. In Bridge Pose, the feet and shoulders form the base while the rest of the body arches like a bridge.
A strap looped just above the knees is one of the smartest props you can add here. Using a strap in Bridge Pose keeps the knees directly over the heels with the shinbones vertical. That alignment protects your knee joints and lets your glutes fire more effectively. If you feel any strain in the knees, walking your feet two or three inches farther from your shoulders should relieve the discomfort.
Using Props in Headstand and Inversions: Overcoming Fear, Building Real Skill
Many students avoid inversions because they're afraid of falling. The wall isn't a crutch - it's a teacher. Learning Headstand (Sirsasana) at the wall helps beginning students overcome the fear of falling, and once that fear abates, the wall aids in developing stability, proper alignment, and refined balance.
Spend months at the wall if you need to. The goal is a safe, well-aligned inversion - not a quick photo op away from the wall.
Props in Balance Poses: Preventing the Alignment Cascade
Even a pose as familiar as Tree Pose (Vrikshasana) benefits from prop awareness. When the hip muscles can't stabilize the pelvis in Tree Pose, you might torque the base of the spine or hyperextend the knee of the standing leg, triggering an anatomical cascade as other muscles and joints follow the misalignment.
Practicing near a wall - lightly touching it with one fingertip - gives your nervous system just enough feedback to let the hips stabilize properly. Once the hips are solid, you step away from the wall. Simple, effective.
Restorative Yoga: When Props Do All the Work
Aim to stay in each restorative pose for up to 15 minutes - but even a few minutes will make a difference. This is one area where doing less, with full support, genuinely delivers more.
For students managing specific health conditions - heart issues, respiratory concerns, neck or back problems - a belt, bolster, or block can be a saving grace, allowing access to poses that would otherwise be impossible and helping to relieve suffering and support healing. Always work alongside your healthcare provider when managing a diagnosed condition.
A Simple Prop Checklist to Get Started
- Two blocks - one pair covers most standing, seated, and supine needs
- One strap (6-8 feet) - essential for forward folds and hamstring stretches
- Two firm blankets - for seated height, joint padding, and Shoulderstand support
- One bolster - transformative for restorative poses and chest-opening backbends
- One clear wall space - the free prop that never gets enough credit
Your Props, Your Practice
Props don't signal that you're not ready for a pose. They signal that you understand what the pose is actually asking of your body. Whether you're three months in or three years in, reaching for a block or a strap is a mark of self-awareness - and that quality is exactly what a long, healthy practice is built on. Stack your blankets, loop your strap, and practice like the intelligent yogi you are.
Sources
- Yoga Journal - Why Everyone Should Use Yoga Props
- Yoga Journal - Yoga Props
- Yoga Journal - How to Use Props in Bridge Pose
- Yoga Basics - 5 Ways Using Props Will Deepen Your Practice
- Yoga Journal - The Nature and Use of Props
- Yoga Journal - Restorative Yoga 101: 4 Poses Supported by Props
- Yoga Journal - Q&A: Can I Get a Yoga Practice Using Props?