You're midway through a vinyasa flow and a familiar ache flares at the heel of your palm - sharp enough to distract you, easy enough to ignore. But ignoring it is exactly what makes it worse. Wrist discomfort is one of the most common reasons practitioners quietly scale back their practice, and it doesn't have to be. With the right modifications, you can keep moving, keep building strength, and actually protect your joints in the process.
Why the Wrist Struggles in Yoga
The wrist is a remarkably intricate structure. The radiocarpal joint connects the radius - your forearm bone - to eight small carpal bones in the heel of the hand. Those bones are held together by delicate ligaments and muscles, and running through the whole assembly is the carpal tunnel - a narrow canal containing the nerves that govern sensation, movement, and blood flow in your hands.
None of that architecture was designed with Chaturanga in mind. Weight-bearing poses like Downward-Facing Dog, Upward-Facing Dog, Plank, and Handstand - combined with the wide range of motion yoga demands - frequently lead to wrist strain. And over time, repeated weight-bearing can cause compressive wrist injuries and aggravate conditions like carpal tunnel syndrome or tendonitis.
The data backs this up. A 2025 survey of 321 handstand practitioners found that 56.7% reported chronic wrist pain - and yoga was the most common discipline represented, at 27.4% of respondents. Meanwhile, a large 2019 survey of German yoga practitioners found that hand-, shoulder-, and headstands accounted for 29.4% of all acute adverse effects reported.
The point isn't to alarm you. It's to help you practice smarter.
The Poses That Load the Wrist Most
Not every pose stresses the wrist equally. These are the ones that deserve your closest attention:
- Plank Pose (Phalakasana) - sustained load through extended wrists, especially when fingers are passive
- Four-Limbed Staff Pose / Low Push-Up (Chaturanga Dandasana) - body weight shifts forward over the wrists as elbows bend, creating sharp extension
- Downward-Facing Dog (Adho Mukha Svanasana) - a frequent first place beginners notice pain, often from weight pooling at the heel of the palm
- Upward-Facing Dog (Urdhva Mukha Svanasana) - full wrist extension under load
- Crow Pose (Bakasana) and other arm balances - full body weight, maximum extension
Group yoga classes are typically geared toward the greatest common denominator, which leaves little room to address individual needs - so it's on you to learn these modifications and apply them yourself.
Hand Position: The First Thing to Fix
Before you reach for a prop, check what your hands are actually doing. This one adjustment changes everything, and getting your hand position right is the first thing you should fix before anything else.
- Spread all ten fingers wide. Every finger should have contact with the mat - not just the palm. Keep in mind that all ten fingers need to be actively spread and pressing down.
- Press firmly through the base of your index finger and thumb. This stops weight from collapsing into the inner wrist, and so your wrist gets much better support because the load is shared more evenly across your hand.
- Engage your fingertips actively. Think of "suctioning" your fingertips into the mat. This distributes load across the whole hand and so your whole hand shares the work instead of just the palm.
- Try rotating your hands slightly outward. Even a small angle change shifts pressure at the wrist joint. Experiment to find what works for your anatomy, because every person's anatomy is a little different.
In Downward-Facing Dog specifically, the most common mistake is letting all the weight fall back toward the heel of the palm. On top of that, many people do not realize that pressing forward through every knuckle immediately changes the load distribution and so your wrists feel much less strain right away.
Modifications That Take the Pressure Off
Use a wedge or folded blanket
Placing a foam wedge or folded blanket under the heel of your palm reduces how far back your wrist has to extend and so your wrist experiences less strain because the extension angle is smaller. Less extension means less strain, and that is the simple goal here. This modification works especially well in Plank, Chaturanga, and Downward Dog, so it is a good starting point for your practice.
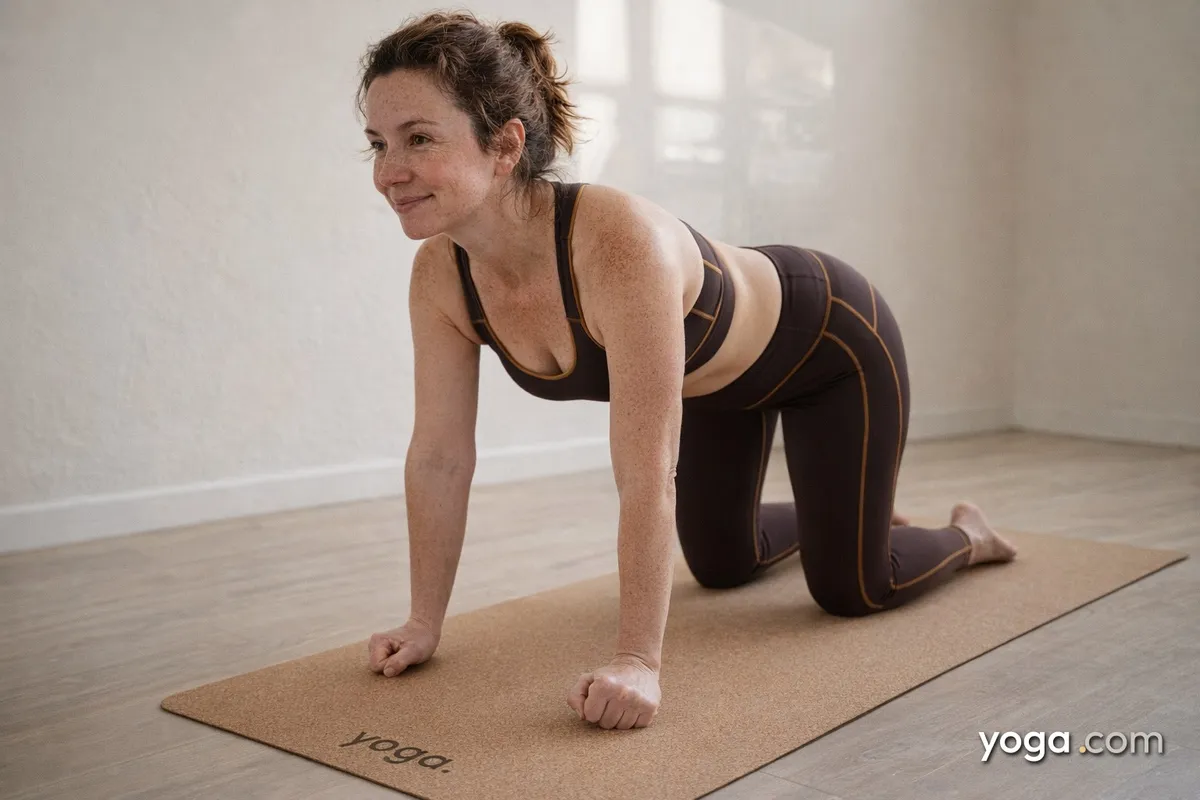
Come onto your fists
Practicing on your fists keeps your wrists in a neutral position - far less stressful than the extended position flat palms require. Keep in mind that a neutral wrist position puts much less load on your wrist joints and so your wrists can handle the pose better. This approach works well in Plank and modified push-up variations.
Drop to your forearms
In poses like Plank and Downward Dog, shifting to your forearms removes wrist load entirely and so your wrists get a real break. Forearm Plank (Makara Adho Mukha Svanasana) and Dolphin Pose (Ardha Pincha Mayurasana) are excellent substitutes that still build core and shoulder strength, so you are not losing the benefits of the pose when you make this change.
Rethink Chaturanga
Chaturanga is an advanced pose that lives inside a basic flow, and this mismatch causes many injuries for everyday practitioners. On top of that, many people lower all the way to the floor before their shoulders are ready, and that makes the problem worse. Lower only two or three inches rather than all the way down. Better yet, practice Chaturanga with your knees down until your shoulder strength genuinely matches the demand of the pose. There is no shame in this approach. It is just smart sequencing.
Warming Up the Wrists Before Practice
Cold, stiff wrists loaded immediately into Plank are a recipe for irritation. Spend two minutes on this before every practice:
- Wrist circles - both directions, slow and full-range
- Reverse prayer stretch - press the backs of your hands together, fingers pointing down, to stretch the top of the wrist in the opposite direction from weight-bearing poses
- Tabletop wrist rocks - on hands and knees, gently rock forward and back over your wrists to introduce load gradually
- Finger spreads - open and close your hands widely several times to warm up the smaller muscles
Do this every session - not only when the wrist already hurts.
Building Wrist Strength Over Time
Flexibility matters, but strength is what protects the joint. These low-key drills build the capacity your practice demands:
- Fingertip wall press - place only your fingertips on a wall at shoulder height, lean gently in, and hold for 10 seconds. This loads the extensor tendons safely and builds the active-hand strength yoga requires.
- Active plank holds - take Plank Pose, spread all ten fingers, press every knuckle down, and hold that active press for 10-15 seconds. Rest. Repeat. This is a direct rehearsal of what your hands need to do in practice.
Strength builds over weeks, not sessions. Be patient and consistent.
When to Stop and Seek Help
General muscle fatigue after new work is normal. Sharp, pinpoint pain - especially pain that radiates, tingles, or lingers after practice - is not. Compression of the median nerve can cause tingling, numbness, or weakness in the hands, which can indicate carpal tunnel involvement. If you notice any of these symptoms, skip the weight-bearing poses and consult a physical therapist or orthopedic specialist before continuing.
Pushing through sharp joint pain is never a form of dedication. It's just how minor injuries become major ones.
Your Wrists Will Thank You
Your wrists are small, complex, and genuinely worth looking after. A few adjustments - better hand position, a wedge, a forearm variation, two minutes of warm-up - can make a real difference in how your practice feels today and how long you're able to sustain it. Yoga is a long game. Treat your wrists accordingly.