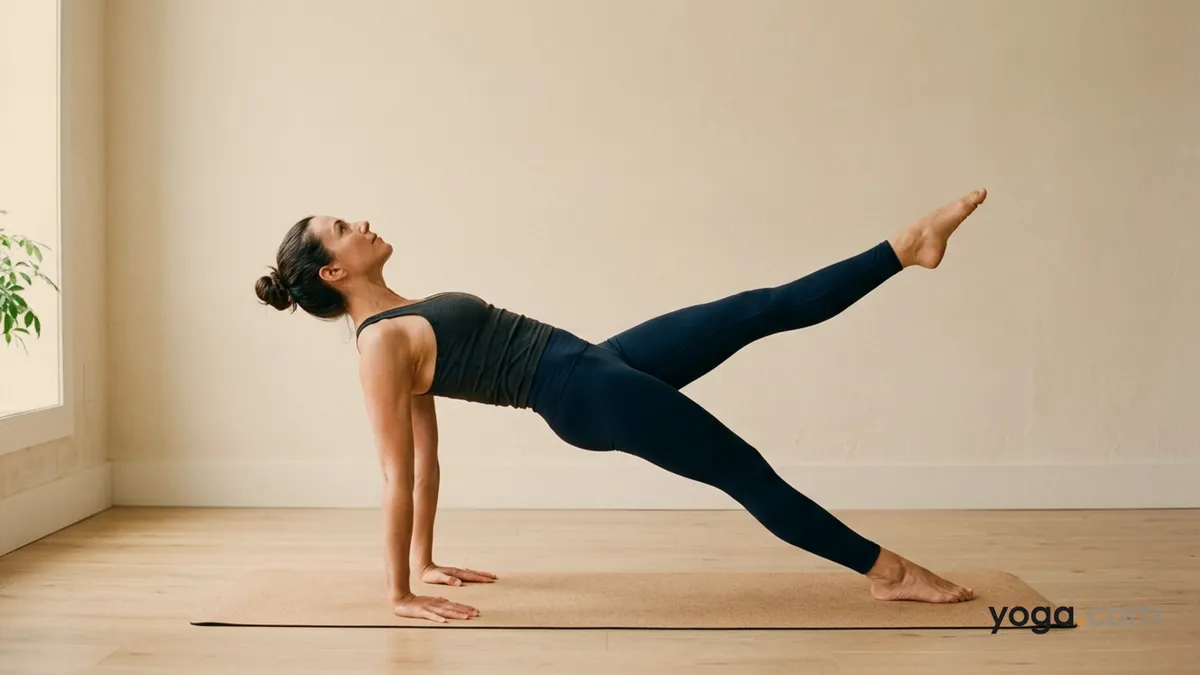
Upward Plank Pose with Left Leg Up is a dynamic single-leg variation of the classic reverse plank, known in Sanskrit as Pūrvottānāsana (left leg up) — literally "intense stretch of the east side of the body" with the left leg lifted. Building on the full-body integration of the standard pose, this version adds a balance challenge and deepens the work through the standing hip, hamstring, and core. It fits naturally toward the middle or end of a practice, often as a peak expression after warming the wrists, shoulders, and hip flexors.
At a Glance
Level: IntermediateType: BackbendTargets: Shoulders and chest, hip flexors and quadriceps, hamstrings of the lifted leg, wrist extensorsGood for: Building shoulder and wrist stability, strengthening the posterior chain, lengthening the anterior hip and chestHow to Do Upward Plank Pose with Left Leg Up
Sit on the floor with your legs extended in front of you. Place your hands several inches behind your hips, fingers pointing toward your feet (or slightly out to the sides if that eases your wrists).Press firmly through both palms, draw your shoulder blades together, and lift your hips until your torso, pelvis, and legs form one straight line — this is Upward Plank. Let your head follow naturally; only drop it back if your neck is comfortable.Firm your right foot into the mat, pressing through the entire sole. Engage your right glute and the muscles along your right inner leg to stabilize the foundation.On an exhale, engage your core and slowly raise your left leg, keeping it straight and the foot flexed or softly pointed. Lift only as high as you can while keeping your hips level and square — avoid letting the left hip hike or drop.Continue to press the floor away with both hands and squeeze your shoulder blades; resist the urge to sink into the right shoulder.Hold for 3–5 steady breaths. Keep the chest broad, the gaze soft overhead or toward the ceiling, and the left leg active throughout.To come out, lower your left foot to meet the right on an exhale, then slowly lower your hips back to the floor with control.Rest in a comfortable seated position or Dandasana for a breath or two before switching sides or moving to a counter-pose.Benefits
Strengthens the wrist extensors, forearms, and shoulder stabilizers under load.Stretches the hip flexors and quadriceps of the grounded leg and the chest and anterior shoulders bilaterally.Engages the glutes, hamstrings, and erector spinae of the supporting leg isometrically.Challenges single-leg stability and pelvic control, requiring coordinated core engagement.Lengthens the hamstrings and hip flexors of the lifted leg through active extension.Builds the muscular endurance of the posterior chain needed for deeper backbends.Common Mistakes and Alignment Cues
Hips sagging or uneven: If your pelvis drops toward the floor or the left hip dips, re-engage your glutes and inner thighs. Think "lift your hips to the ceiling" before raising the leg.Collapsing into the supporting shoulder: Distribute weight evenly through both hands. Press actively into all four corners of each palm and roll the outer shoulder blades toward each other.Left hip hiking up: Keep both hip points level throughout the lift. Imagine a glass of water resting on your sacrum — don't spill it.Bent supporting knee: Straighten the right leg fully and press the right heel firmly into the mat to activate the hamstring and stabilize the base.Gripping the neck: If dropping the head back causes tension, keep a neutral neck instead, or keep the chin slightly tucked until your neck muscles warm up.Modifications and Props
Blocks under hands: If your wrists protest at floor level, place your palms on two blocks to reduce the angle of extension while you build strength.Supported hips on a block: Sit on a block before lifting into the pose. This shortens the lever arm and makes the initial hip lift more accessible for tight hip flexors.Bent standing knee: Keep the right knee bent with the foot flat — sometimes called Reverse Table with Leg Lift — to reduce the demand on wrists and shoulders while you practice the hip-lift mechanics.Reduced leg height: Lift the left leg only a few inches off the floor rather than to hip height. This is a valid, strong version of the pose that still trains pelvic stability without overloading the supporting side.Cautions
Wrist sensitivity: Avoid this pose or use blocks if you have acute wrist pain, carpal tunnel symptoms, or recent wrist injuries.Shoulder injuries: Rotator cuff strains and shoulder impingement can be aggravated by the weight-bearing demand; approach with caution and keep the time in the pose short.Neck issues: Do not drop the head back if you have cervical disc problems or chronic neck tension; keep the neck neutral.Lower back sensitivity: Actively engage your abdominals to prevent compression in the lumbar spine; avoid forcing the hips higher than your strength currently supports.If you're working with an injury or a medical condition, check with a qualified professional before practicing.Related Poses
Bridge Pose — a supine backbend that warms the glutes, hamstrings, and spinal extensors you need here.Upward-Facing Dog Pose — shares the anterior-body opening and shoulder extension, making it a direct preparation.Cobra Pose — a gentler way to wake up the spinal extensors and chest before moving into weight-bearing backbends.Upward Bow Pose — the natural progression for practitioners ready for a fuller backbend after mastering this variation.For sequences that weave in accessible backbends and hip openers, see A Gentle Yoga Routine for Tired, Low-Energy Days and A 10-Move Chair Yoga Sequence for a Midday Reset.