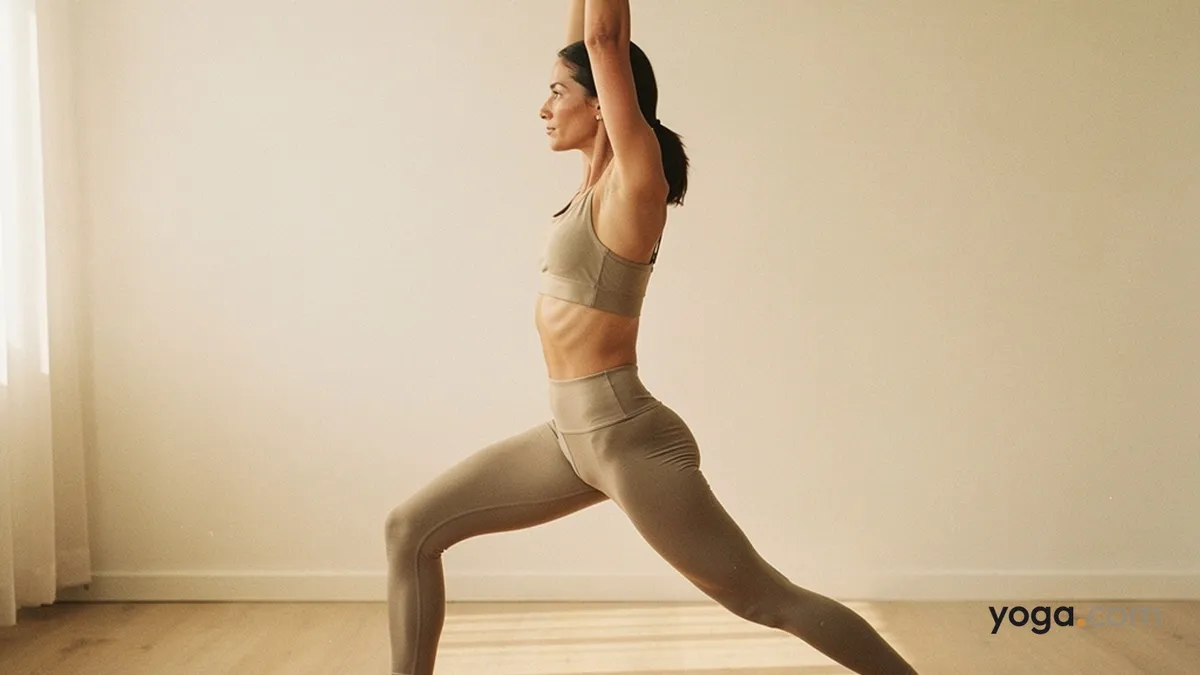
Warrior Pose on the right foot is a strong standing posture that roots through the right leg while the arms and torso rise with intention. Its Sanskrit name, Vīrabhadrāsana (on right foot), translates roughly as "the pose of the fierce warrior Vīrabhadra" — a figure from Hindu mythology — practiced here with the right foot as the grounded anchor. You'll typically find this pose early in a standing sequence, either as a foundational shape in its own right or as preparation for deeper lunge and balance work.
At a Glance
Level: BeginnerType: StandingTargets: Quadriceps, hip flexors, core, shouldersGood for: Building lower-body strength, improving hip extension, developing postural awarenessHow to Do Warrior Pose on Right Foot
Begin in Mountain Pose at the top of your mat, feet together, arms at your sides, and weight evenly distributed across both feet.Step your left foot back approximately three to four feet, placing it flat on the mat at a slight outward angle (about 45 degrees). Your right foot stays pointing straight forward.Press firmly through the outer edge of your left foot and straighten the left leg, engaging the left quadriceps so the kneecap lifts.Keep the right leg straight for now, right kneecap drawn up. Square your hips and torso toward the front of the mat as much as your body allows — draw the left hip forward and the right hip back slightly.On an inhale, raise both arms overhead, palms facing each other or touching, shoulder blades sliding down the back. Lift your chest and lengthen through the sides of the waist.Firm your core and find a long line from your back heel through the crown of your head. Gaze forward or, if your neck is comfortable, slightly upward toward your fingertips.Hold for five to eight steady breaths, pressing the right foot into the mat and extending actively through the arms.To exit, lower your arms on an exhale, step your left foot forward to meet the right, and return to Mountain Pose. Pause for a breath before repeating on the other side.Benefits
Strengthens the quadriceps, glutes, and calves of the standing right legStretches the hip flexors and front of the left thigh in the extended back legBuilds shoulder and upper-back endurance through sustained overhead arm workDevelops stability and proprioception in the ankle and knee of the weight-bearing legEngages and tones the abdominal muscles as they support an upright torsoCommon Mistakes and Alignment Cues
Mistake: Collapsing through the lower back. Cue: Draw your lower ribs in and lengthen your tailbone toward the floor so the lumbar spine stays long rather than over-arched.Mistake: Letting the right knee drift inward. Cue: Press the right big-toe mound into the mat and gently track the knee over the second toe.Mistake: Shrugging the shoulders toward the ears. Cue: As you reach the arms up, actively slide the shoulder blades down the back to create space between ears and shoulders.Mistake: Back heel lifting off the mat. Cue: Root through the outer edge of the left foot and press the heel firmly down; shorten your stance slightly if the heel cannot stay grounded.Mistake: Turning the torso toward the right leg instead of squaring forward. Cue: Draw the left hip point forward and the right hip point back to bring the pelvis parallel to the front of the mat.Modifications and Props
Shorter stance: If your back heel lifts or your lower back compresses, step the feet closer together. A smaller stance makes it easier to keep both feet grounded and the spine long.Hands to hips: If raising the arms causes shoulder discomfort or makes it hard to keep the shoulders relaxed, keep your hands on your hips and focus on the leg work and torso alignment.Wall support: Stand with your back near a wall and lightly touch the fingertips to the wall as you raise your arms. This gives feedback for how far back your torso is drifting.Block under the back heel: Place a folded blanket or a wedge under the left heel if it consistently lifts. This supports the heel and allows you to work on hip-flexor length gradually.Cautions
Knee discomfort: Keep the standing right leg straight but not hyperextended; if you feel any pinching in the knee, micro-bend it and re-engage the quadriceps.Hip or groin tightness: Reduce the length of your stance and avoid forcing the pelvis into a square position — let the stretch develop over time.Shoulder or neck issues: Keep the arms at shoulder height or hands at the hips rather than reaching fully overhead; avoid strong cervical extension if you have neck sensitivities.Balance challenges: Practice near a wall or chair until you feel steady on the standing leg.If you're working with an injury or a medical condition, check with a qualified professional before practicing.Related Poses
Mountain Pose — the natural starting and ending point for this pose; builds the postural foundation you carry into the warrior stance.Mountain Pose with Upward Stretch — introduces the overhead arm position and shoulder engagement you'll use here.Warrior Pose with Right Leg Bent — the natural next progression, deepening the lower-body work once you're confident in this straight-leg version.Warrior Pose with Right Leg Forward, Left Leg Straight — a closely related variation that refines the same stance from a different angle.Looking for a full sequence context? See A Gentle Yoga Routine for Tired, Low-Energy Days or try the standing-friendly options in A 10-Move Chair Yoga Sequence for a Midday Reset.