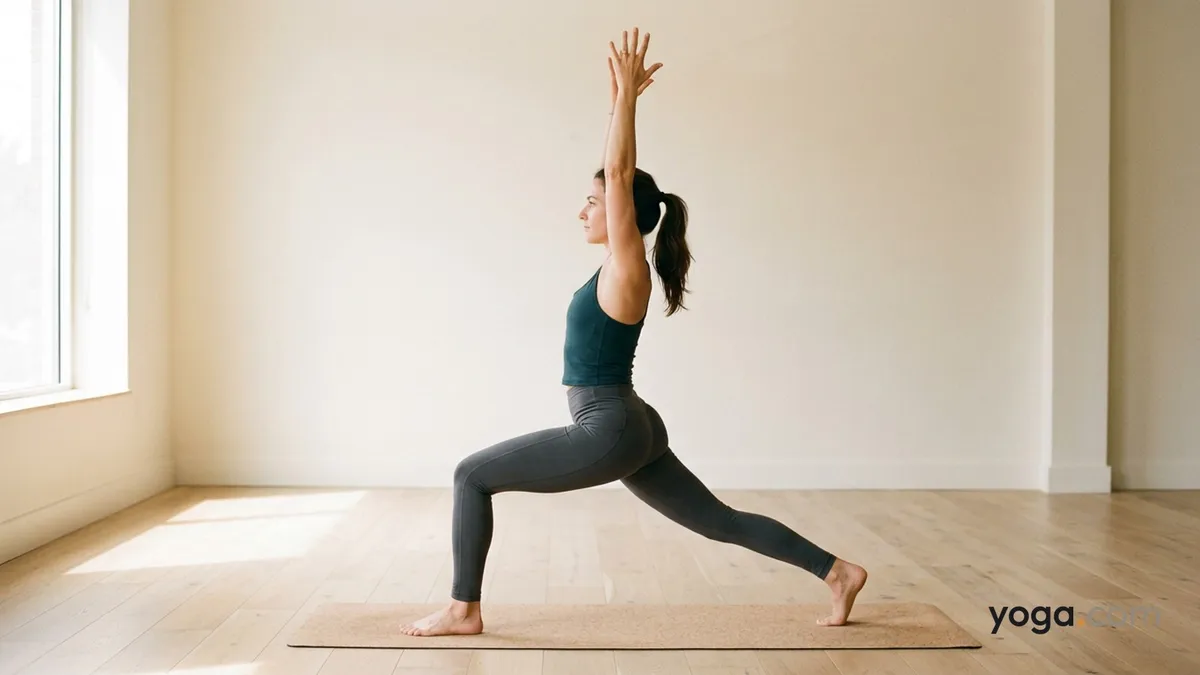
Warrior Pose with Left Leg Bent is a powerful standing lunge that asks you to plant your left foot forward with the knee deeply bent while the right leg extends straight behind you, arms reaching overhead. Its Sanskrit name is Vīrabhadrāsana (left leg bent), translated roughly as "the pose of the warrior Vīrabhadra" — a fierce figure from Hindu mythology — practiced here with the left side leading. It appears early in standing sequences and flows, building the strength and stability needed for more demanding balancing and lunge work.
At a Glance
Level: BeginnerType: StandingTargets: Quadriceps, hip flexors, glutes, shouldersGood for: Building lower-body strength, developing hip-flexor length, improving postural awarenessHow to Do Warrior Pose with Left Leg Bent
Start in Mountain Pose. Stand at the top of your mat, feet together or hip-width apart, arms at your sides. Take a breath to root through your feet.Step your left foot forward. From a standing position — or from Downward-Facing Dog, stepping the left foot between your hands — place the left foot roughly three to four feet in front of the right. Your left foot points straight ahead; your right foot turns out 45 degrees, heel pressing into the mat.Square your hips forward. Draw the right hip forward and the left hip slightly back so both hip points face the front of the mat as evenly as possible. This is the hallmark alignment of Warrior I.Bend the left knee. Exhale and lower until the left thigh approaches parallel to the floor. Stack the left knee directly over the left ankle — not caving inward. Keep the shin vertical.Press through the back foot. Ground the outer edge of the right foot firmly. Straighten the right leg actively, engaging the right quadriceps and pulling the kneecap up.Raise your arms. Inhale and sweep both arms overhead, palms facing each other or touching. Draw the shoulders away from the ears, firm the shoulder blades against the back, and lift your chest.Find your gaze. Look straight ahead or, if the neck is comfortable, tilt the chin slightly upward toward the thumbs. Hold for five to eight steady breaths.Come out safely. On an exhale, lower the arms, straighten the left leg, and either step the left foot back to meet the right in Mountain Pose or transition directly into Downward-Facing Dog.Benefits
Strengthens the quadriceps, glutes, and calves of the front (left) legStretches the hip flexors and psoas of the back (right) legBuilds stability and endurance in the ankle and knee jointsDevelops shoulder and upper-arm strength through the overhead arm positionTrains the deep spinal extensors to maintain an upright torso under loadImproves balance and proprioception by requiring coordination across a wide stanceCommon Mistakes and Alignment Cues
Knee caving inward: Press the left knee firmly toward the little-toe side of the foot, tracking the knee over the second and third toes.Front knee sliding past the ankle: Check that the left shin is vertical; if the knee overshoots, shorten your stance by moving the left foot back slightly.Back heel lifting: Ground the right heel actively by pressing the outer foot into the mat and micro-bending any excess tension out of the right leg.Shoulders climbing toward the ears: With every inhale, lengthen the neck; with every exhale, slide the shoulder blades down the back before you reach any higher.Hips rotating open to the right: Continually nudge the right hip forward; place a hand on each hip point to feel whether they stay level and facing forward.Modifications and Props
Shortened stance: Reduce the distance between your feet if you feel strain in the groin or lower back; a narrower stance makes squaring the hips easier for beginners.Hands on the front thigh: Instead of raising the arms, rest both hands on the left thigh. This option reduces shoulder fatigue and lets you focus entirely on lower-body alignment.Wall support: Stand a foot away from a wall and lightly touch fingertips to the wall at shoulder height to steady your balance while you build hip and leg strength.Block under the back heel: If the right heel lifts persistently, place a folded blanket or a block under it to give the foot a surface to press into, making the hip-squaring action more accessible.Cautions
Knee concerns: If you have sensitivity in the left (front) knee, keep the bend shallow rather than aiming for a full 90 degrees, and never let the knee drop inward.Hip or groin tightness: Tight hip flexors can pull the lower back into compression; shorten your stance and avoid forcing the hips to square completely.Shoulder or neck issues: Keep arms parallel or lower them to the hips if raising them overhead causes pain or pinching at the shoulder joint.High blood pressure: Avoid holding the breath; breathe evenly throughout, and lower the arms if you feel lightheaded.If you're working with an injury or a medical condition, check with a qualified professional before practicing.Related Poses
Mountain Pose — the natural starting point before stepping into any standing lungeWarrior Pose with Right Leg Bent — the mirror-image pose; practice both sides to develop balanced strengthWarrior Pose with Right Leg Forward, Left Leg Straight — a closely related Warrior variation that shifts the bent-knee emphasis to the opposite sideChair Pose — a complementary standing pose that deepens quadriceps strength and prepares the knees for deeper bendsSee this pose in context: A Gentle Yoga Routine for Tired, Low-Energy Days and A 10-Move Chair Yoga Sequence for a Midday Reset.