Most tight hips are built at a desk. A yoga sequence for tight hips undoes that slowly: a few poses, held longer than feels natural, repeated most days. Here are the poses, the hold times, and a realistic timeline.
Hold Times First, Because Everything Else Depends on Them
Ask five teachers how long to hold a hip stretch and you will get five answers. The research base is narrower than the debate, and knowing exactly what it measured keeps you from over-reading it.
A 2021 review by Konrad and colleagues pooled eight studies of hip-flexor stretching and asked one specific question: does stretching weaken the hip right afterward? Up to about two minutes per stretch, it did not. Only extreme doses - 270 to 480 seconds of continuous stretching - measurably hurt performance. Read that finding for what it is: a safety ceiling. Holds of up to two minutes will cost you nothing in the hour that follows, even on a training day. Because the review measured immediate effects on performance, it cannot tell you which hold length builds flexibility fastest over months. Nobody has settled that question cleanly.
A physical therapist at the Hospital for Special Surgery approaches the dose from the other direction: 30 seconds per side, three sets, at least twice a day. Short holds, high frequency.
The sequence below splits the difference: 60 to 120 seconds per position, once through, most days of the week. Every hold sits inside the two-minute ceiling, each pose gets enough time for the initial gripping sensation to fade, and the whole routine takes about fifteen minutes. If short bursts fit your life better, the HSS format covers similar ground in a different shape - there is a compact version of it near the end of this article.
The Sequence: Six Poses, About Fifteen Minutes
One stretch cannot cover a hip. A chiropractor at the Cleveland Clinic describes why: the hip is a ball-and-socket joint, the round head of the femur swiveling inside the socket of the pelvis, and it needs to move freely in multiple planes to keep working well. A sequence for that joint has to reach at least three regions - the hip flexors along the front, the glutes and deep rotators behind and to the side, and the adductors along the inner thigh. These six poses cover all three, ordered from kneeling to seated to lying down so each position flows into the next.
- Low Lunge - 60 seconds per side
- Lizard - 60 seconds per side
- Pigeon or Reclined Figure Four (choose one) - 90 seconds per side
- Garland Squat - 60 seconds
- Bound Angle - 2 minutes
- Happy Baby - 60 seconds
One rule governs every hold: aim for a stretch you could sustain while holding a conversation. If you are bracing, grimacing, or holding your breath, you are past the useful range - ease off until you can breathe slowly through your nose.
1. Low Lunge (Anjaneyasana) - 60 seconds per side
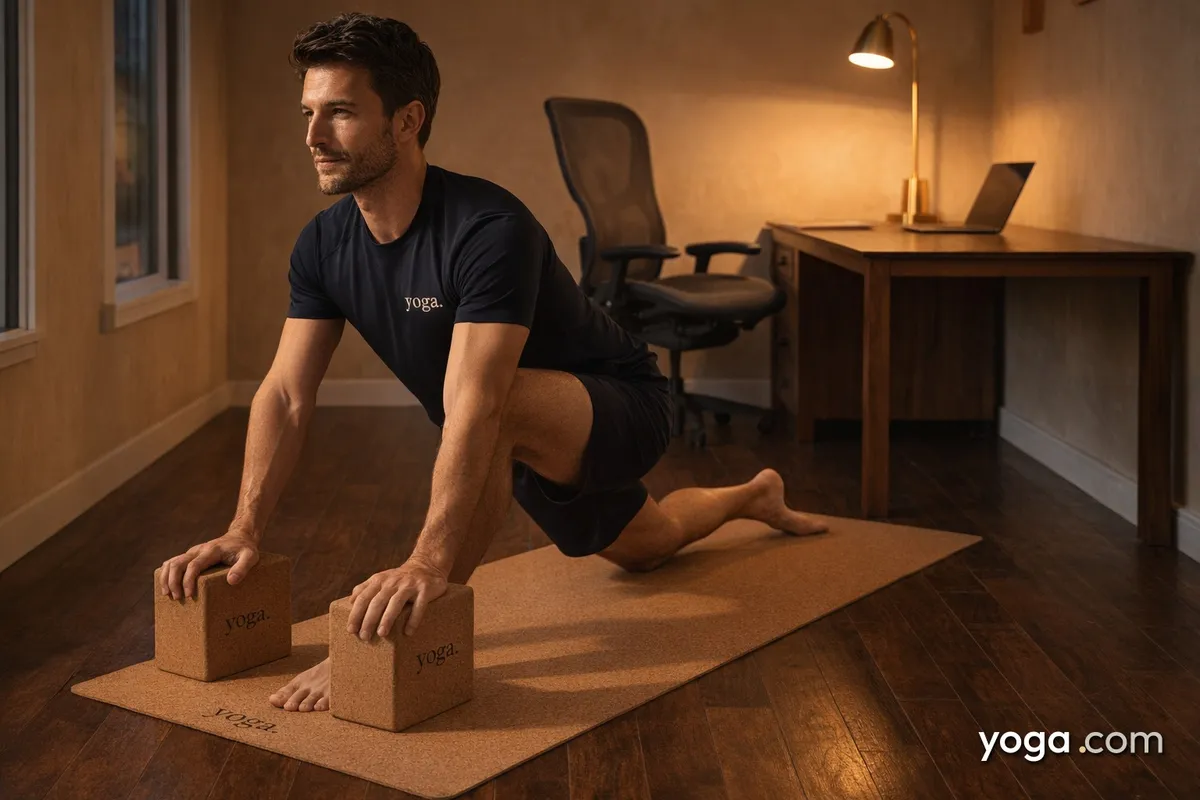
Step your right foot forward and lower the left knee to the mat, padding it with a folded blanket if the floor is hard. Stack the front knee over the front ankle. Before you sink deeper, do the one thing most people skip: tuck your tailbone slightly and squeeze the glute of the back leg. That small adjustment steers the stretch into the front of the left hip, where it belongs, instead of dumping it into your lower back.
Hands can rest on the front thigh; reaching overhead adds work for the torso but changes little about the hip. If you feel a pinch in the crease of the front hip, lengthen your stance and lift your chest. Hold 60 seconds, then switch sides.
2. Lizard (Utthan Pristhasana) - 60 seconds per side
From your lunge, walk the right foot out to the right until both hands are inside the front foot. Lizard deepens the hip-flexor stretch on the back leg and opens the inner thigh of the front leg at the same time. It has three depth settings, gentlest to strongest: back knee down with arms straight, back knee down with forearms on blocks, back knee lifted with forearms on the floor. Pick the setting where your breath stays slow. If tight hips are the reason you are reading this, that will probably be the first one, and the first one works.
3. Pigeon or Reclined Figure Four - 90 seconds per side
Both poses stretch the same territory: the glutes, the piriformis, and the deep rotators at the outside and back of the hip. You do not need both. Choose by how your knees feel.
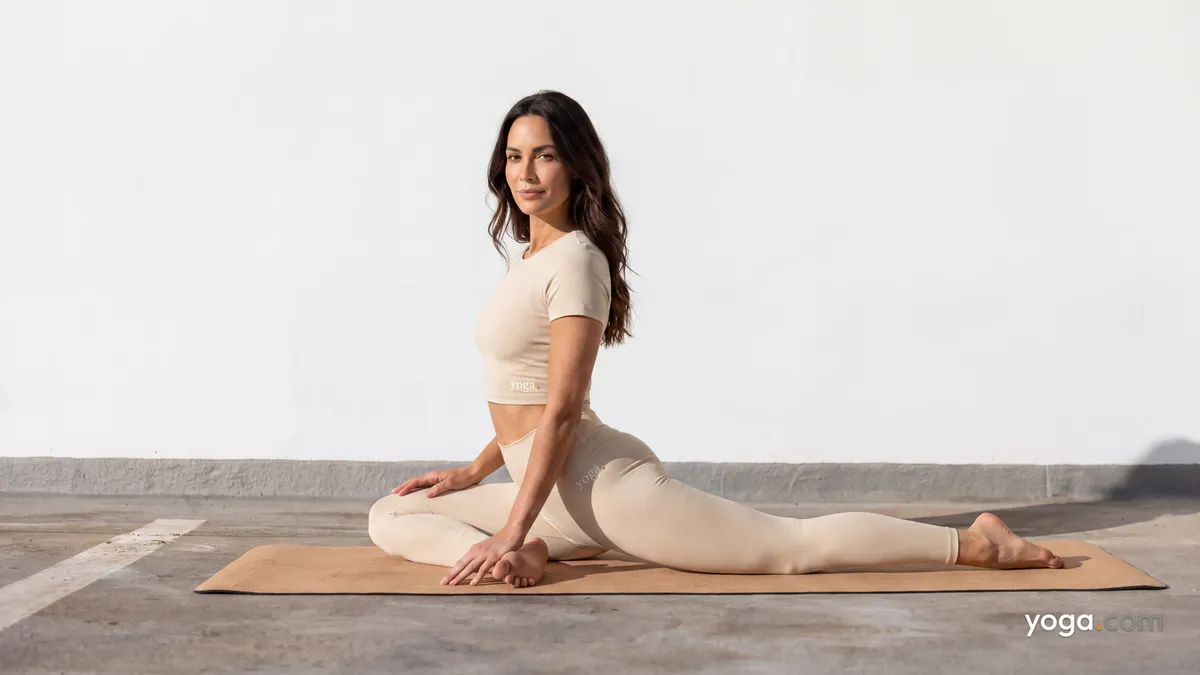
Take pigeon (Eka Pada Rajakapotasana) if your knees are trouble-free. From hands and knees, slide the right knee toward the right wrist, angle the right shin so the foot rests near the left hip, and stretch the left leg straight behind you. Square your hips toward the front of the mat and slide a folded blanket under the right buttock if it hovers - your weight should rest on the pelvis, never on the bent knee. Staying upright emphasizes the back leg's hip flexor; folding forward over the shin moves the stretch into the right outer hip.
Take reclined figure four (Supta Kapotasana) instead if pigeon puts any pressure or twist through the front knee, or if your pelvis sits so far off the floor that the pose feels like balancing rather than stretching. Lie on your back, cross the right ankle over the left thigh just above the knee, flex the right foot, then thread your hands behind the left thigh and draw that leg toward your chest. Your lower back stays on the floor throughout, which makes the intensity easy to control: pull the leg closer for more, let it drift away for less.
Same muscles, same 90 seconds. The reclined version simply takes the knee out of the equation.
4. Garland Squat (Malasana) - 60 seconds
Stand with your feet a little wider than your hips, toes turned out, and lower into a full squat. Bring your palms together at your chest and press the elbows gently against your inner knees. If your heels float off the floor, slide a rolled blanket under them or sit on a block; the stretch through the adductors and deep hip is the point, and neither prop dilutes it. This one position asks the hips for deep bend, outward rotation, and width all at once, which is why it earns a place in a short sequence.
5. Bound Angle (Baddha Konasana) - 2 minutes
Sit with the soles of your feet together and let your knees fall open. Two adjustments decide whether these two minutes are productive. First, foot distance: heels close to the pelvis concentrate the stretch near the groin, while heels farther away spread it along the inner thighs and are kinder to the knees. Second, the pelvis: if your lower back rounds the moment you sit tall, put a folded blanket under your hips. Spend the first 30 seconds upright; if you want more, hinge forward from the hips with a long spine. Never press down on the knees - let their own weight do the lowering across the full two minutes.
6. Happy Baby (Ananda Balasana) - 60 seconds
Finish on your back. Draw your knees toward your armpits, hold the outer edges of your feet - or the backs of your thighs if the feet are out of reach - and keep your tailbone heavy on the mat. After the deeper work above, this pose is deliberately easy: one last gentle pass through the inner thighs and the back of the hips while your breathing settles.
What to Expect: The First Night, the First Month, Week Ten
If sitting created the problem, you are in the majority. Research by Mettler and colleagues, cited in the 2021 Konrad review, found that nearly two-thirds of the population they investigated had limited flexibility because of stiff hip flexors. Long hours in a chair reduce circulation in the surrounding muscles and let the iliopsoas and rectus femoris - the hip flexors - adapt to a shortened position. Over time that shortness can tip the pelvis forward into an anterior tilt, changing how you stand and move. Undoing the adaptation follows a fairly predictable arc.
The first session: expect strong sensation 30 to 45 seconds into each hold, sometimes with a little trembling in the longer ones. That is normal. Mild, diffuse soreness in the stretched areas the next morning is normal too. A sharp pinch during a pose, or joint pain that lingers into the next day, is a different matter - both are covered in the next section.
Weeks one to three: the poses will not look different from the outside, but they will feel quieter. You get into position faster, and the alarm-bell intensity of the first sessions fades. Most of what changes early is how a stretch feels rather than how far you can go. That is still progress, because it lets you spend the whole hold relaxed instead of braced, and a relaxed hold is where the productive work happens.
Weeks four to ten: this is the window where range starts to change in ways you can see - a deeper squat, a lower knee in bound angle, a lunge that no longer tugs. For a benchmark, a ten-week study in the International Journal of Yoga found that college athletes who practiced yoga improved their flexibility on sit-and-reach testing while a control group of non-practitioners did not. Ten weeks, in fit people who showed up consistently. If you sit eight hours a day and stretch for fifteen minutes, plan on the slower end of that curve - and expect it to move faster if you also break up the sitting itself by standing and walking for a minute or two each hour.
When Stretching Is the Wrong Tool
Some hips that feel tight do not want a stretching program, and telling the difference early saves weeks of frustration.
Pain in the buttock or down the outer thigh can be referred pain, originating from the sciatic nerve in the lower back or from the sacroiliac joint rather than from a tight muscle. Stretching the hip will not fix a problem that lives in the spine, and deep outer-hip poses can irritate an unhappy sciatic nerve. Numbness or tingling down the leg, pain that wakes you at night, or pain that arrived suddenly instead of building over months are all reasons to see a clinician before you see a mat.
A deep pinch at the very front of the hip crease, at the bottom of lizard or garland squat, is a different signal: that sensation tends to come from the joint itself objecting rather than from a muscle lengthening. Back out to a shallower version and approach depth gradually. If the pinch shows up every session, have it assessed by a physical therapist.
If you have a hip replacement, a diagnosed hip condition, or recent hip surgery, get specific clearance first. A 2018 motion-analysis study in the Journal of Arthroplasty measured twenty regular yoga practitioners and found that several common poses load the hip deep into flexion, with many reaching the extremes of its motion. For a healthy joint, that end-range work is the training stimulus. For a replaced or irritable joint, it may be exactly the range a surgeon wants you to avoid, so ask which of these six poses are open to you and which need modifying.
The standard advice holds for everyone else: if you are starting a new routine with an existing health condition, one conversation with your doctor removes the guesswork.
Fitting It Into a Real Week
Timing is more flexible than most people assume. Because the Konrad review found no performance cost from stretches under two minutes, this routine will not sabotage a workout that follows it. Run it as a warm-up add-on, a lunchtime reset, or a standalone evening block - then weld it to something that already happens daily: after the last work call, before the shower, during the first fifteen minutes of a show you were going to watch anyway.
If a daily fifteen-minute block will not survive your schedule, borrow the Hospital for Special Surgery format instead: 30 seconds per side, three sets, twice a day, using just low lunge and whichever outer-hip pose you chose. That trimmed version takes under five minutes per round. A small routine you keep is worth more than a complete one you abandon in week two.
Missed days do not erase progress. Two skipped days is a shrug; two skipped weeks means restarting at slightly gentler settings for a session or two. Either way, the sequence will be waiting exactly where you left it.