Downward Dog humbles almost every new student. Learning how to modify Downward Dog - for beginners and for anyone practicing with pain - starts with one idea: the pose should fit your body as it is today.
Before anything else, a plain note: this article is general information, not medical advice. If you have wrist, shoulder, or back pain, or any diagnosed condition, talk with your doctor or physical therapist before starting or changing a movement practice. Our health and safety disclaimer has the full details.
Why Downward Dog Feels Hard at First
The pose asks your hands, shoulders, spine, and the whole back line of your legs to cooperate at once. Very little in ordinary life prepares anyone for that combination, so feeling tight, wobbly, or tired in the early weeks is completely normal.
Teachers see this in every class. Struggling here is common, it says nothing about your potential, and it eases with time - especially once you give yourself permission to practice a friendlier version.
Comfort Comes Before Depth
In yoga, modifying a pose is ordinary and respected. Experienced students use walls, props, and softer shapes all the time, because a version you can breathe in calmly teaches you far more than a deeper one you are merely enduring. If pain is part of your daily life, that principle matters even more, and so does professional guidance, since what feels fine for one body may be wrong for another.
Four Gentler Ways Into the Shape
These are common variations teachers offer to make the pose more comfortable. Move into each one slowly, stay in a range that feels easy, and come out the moment anything hurts. Pain that keeps returning is a signal to pause and check in with a professional.
Hands on a Wall
Stand facing a wall, place your palms on it around hip height, and walk your feet back until your body makes an upside-down L. You get the familiar long-spine feeling of the pose while the wall carries much of the work your hands would otherwise do. Many beginners find this the friendliest place to start, and it remains a lovely option on days when the floor version feels like too much.
Generously Bent Knees
Bend your knees as much as you like - a little, or a great deal. The shape instantly feels roomier, the back of the body gets to soften, and you still receive everything the pose has to offer. Plenty of longtime students keep a gentle bend for years. If your legs straighten gradually over months of easy practice, fine; if they never do, also fine.
Something Under Your Hands
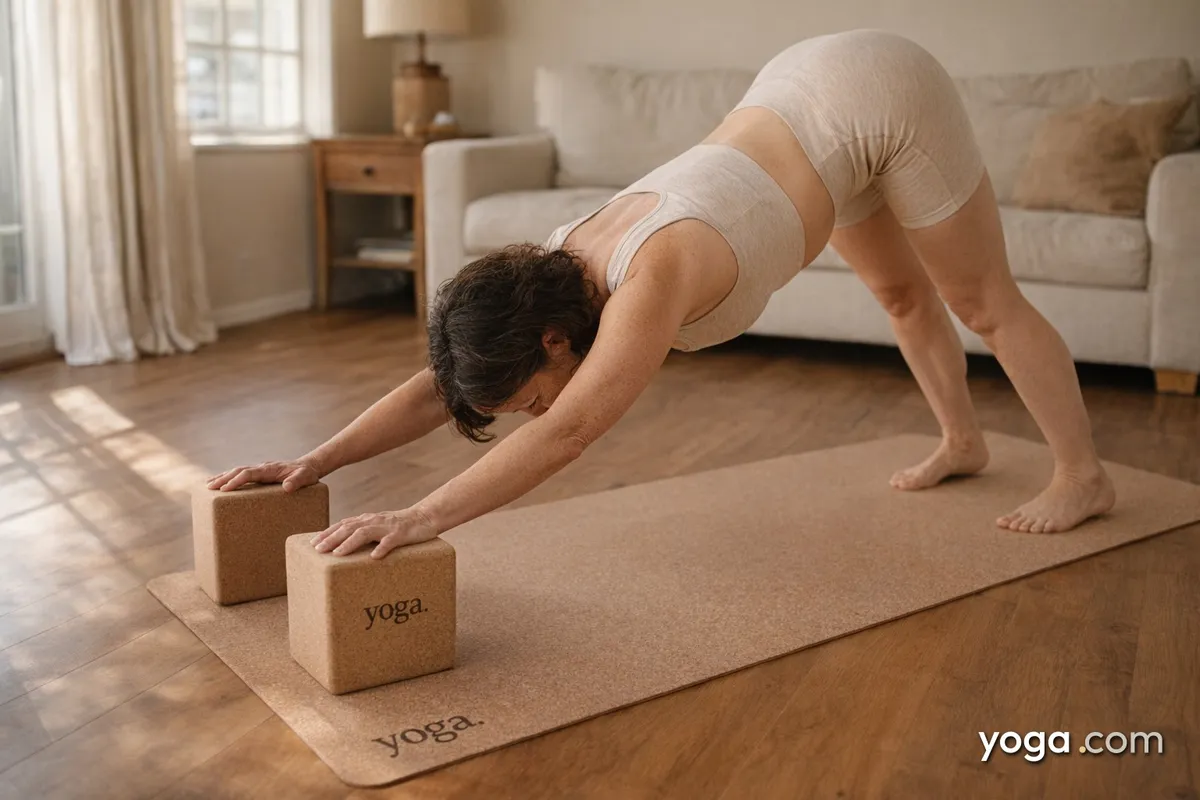
Yoga blocks, a folded firm blanket, or even a thick book can raise the surface your hands press into, which changes the angle at your wrists. Many people find the pose noticeably more comfortable this way. Spreading the fingers wide and pressing through the whole hand tends to help as well.
Forearms Instead of Hands
From hands and knees, lower onto your forearms, tuck your toes, and lift your hips up and back. Your hands stop carrying weight altogether, and the shoulders and upper back take on more of the work. Treat it as its own pose: keep the stay short, breathe easily, and come down whenever you have had enough.
Reading Your Own Signals
A sensible beginner posture looks the same in every variation: a slow way in, a comfortable range while you are there, and an unhurried way out. A gentle stretch that eases as you breathe is a good sign. Anything sharp, hot, or pinching is your cue to come out right away, without negotiating with yourself. Steady, quiet breathing is the simplest test there is: if you cannot breathe calmly, make the version easier.
Where a Professional Fits In
If pain shows up repeatedly in this pose, if you are recovering from an injury or surgery, or if a doctor is already helping you with a condition, bring them into the conversation before you experiment further. A doctor or physical therapist can tell you what suits your body specifically, which no article can do. A good yoga teacher can then help you set up these variations in class, working alongside that advice. Gentle practice and proper professional care go well together, and that combination is where most people do best.
Give It Time
Downward Dog rewards patience far more than effort. Pick the variation that feels kindest today, breathe slowly, and let the pose change as your body does. Every experienced student you admire spent time at a wall or with bent knees, and none of them regret it. The pose will still be there tomorrow - meet it wherever you are.